 by
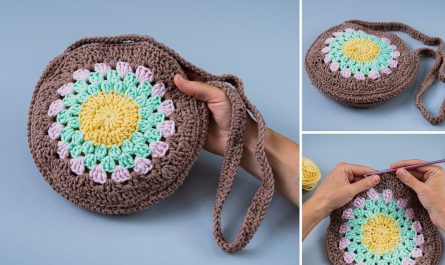
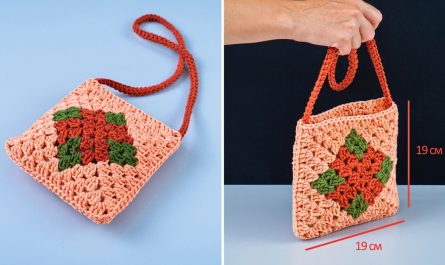
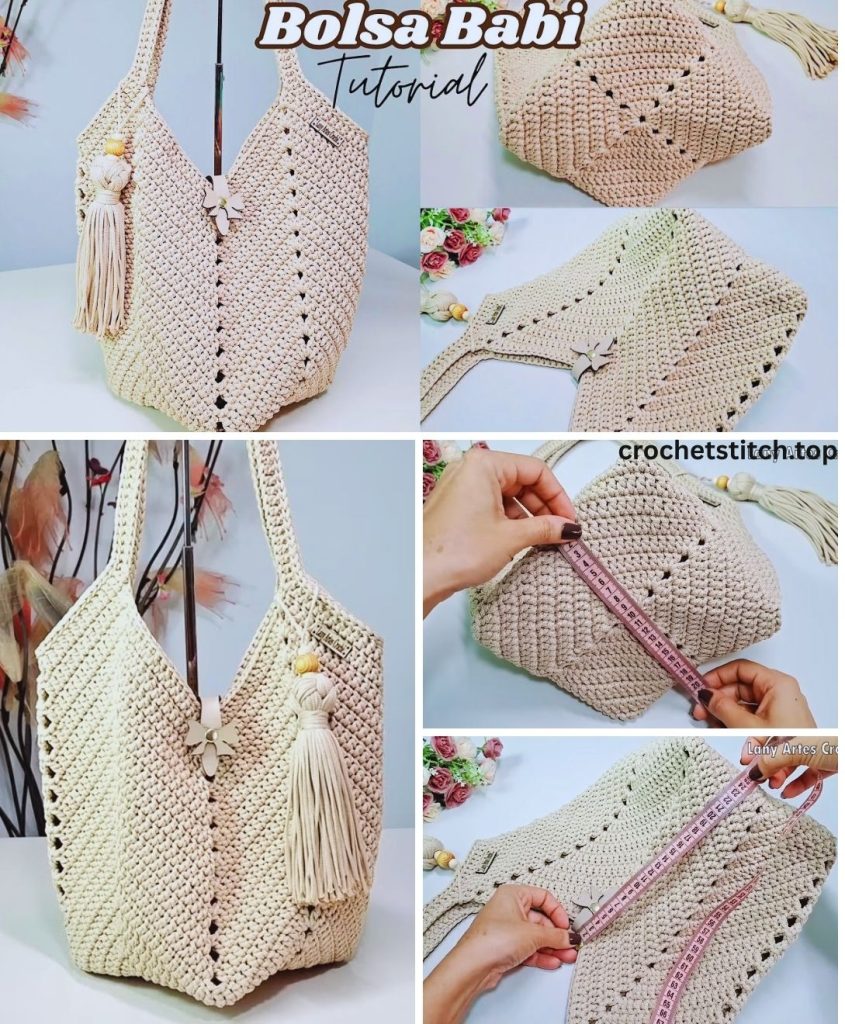
by Welcome to the wonderful world of crochet! One of the most satisfying projects for a newcomer is creating something that is both beautiful and practical. This simple tote bag is the perfect starting point. It uses basic stitches, a simple construction, and works up relatively quickly, giving you a gorgeous, handmade accessory you can be proud to use and show off.
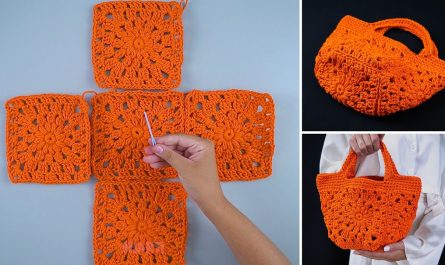
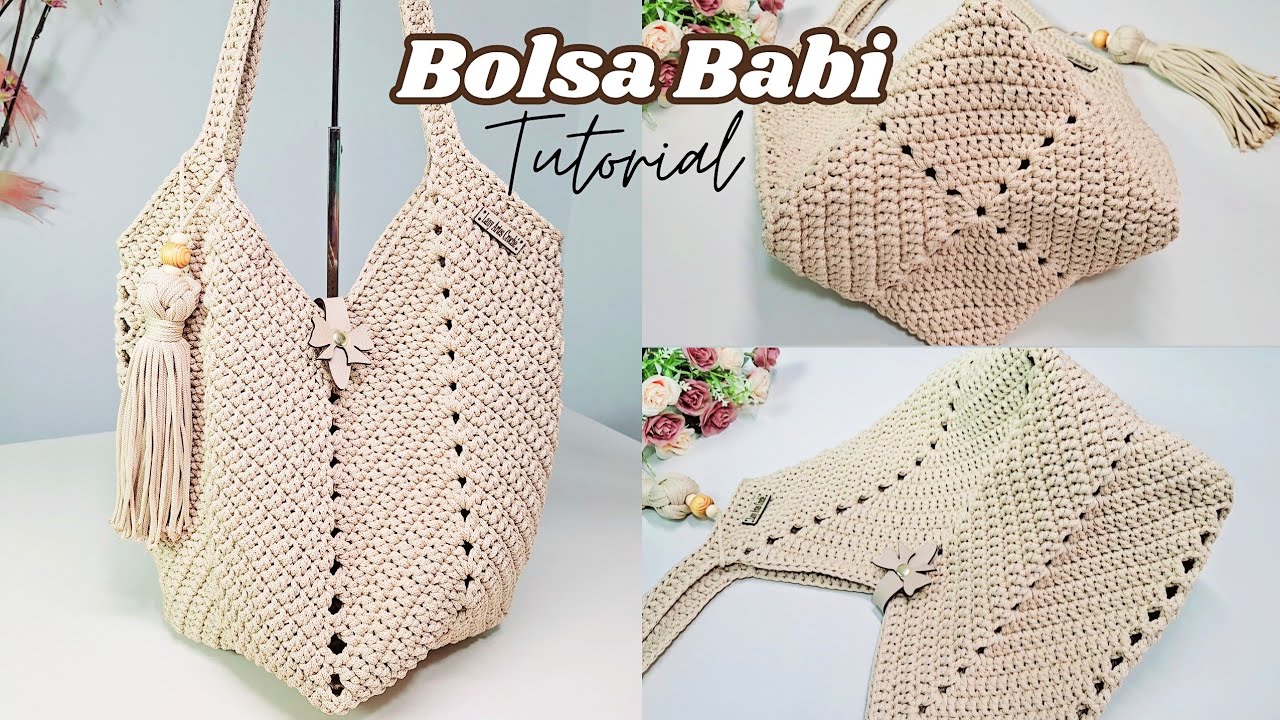
This guide will walk you through every step, from choosing your materials to weaving in the final end. We’ll build the bag from the bottom up: first creating a sturdy rectangular base, then working up the body in seamless rounds, and finally adding simple, integrated straps.
Why This Project is Perfect for Beginners
- Simple Stitches: We will primarily use the single crochet (sc) stitch, one of the first stitches any crocheter learns. It creates a dense, sturdy fabric perfect for a bag.
- Minimal Shaping: The bag is constructed from a simple rectangle and then worked in rounds, meaning you don’t have to worry about complex increasing or decreasing.
- Repetitive & Meditative: The pattern’s repetitive nature helps you build muscle memory and find a relaxing rhythm.
- A Usable Finished Product: There’s no better motivation than creating something you’ll actually use! This bag is perfect for trips to the farmer’s market, the library, or the beach.
Part 1: Gather Your Materials
Choosing the right materials is key to a successful project. For a sturdy tote bag, cotton yarn is highly recommended as it’s strong, durable, and doesn’t stretch as much as acrylic or wool.
- Yarn: Approximately 400-500 yards of Worsted Weight (Category 4) Cotton Yarn. Using two skeins of a popular brand like Lily Sugar’n Cream or Lion Brand 24/7 Cotton is a great option. You can use one solid color or two contrasting colors for a striped effect.
- Crochet Hook: A 5.0mm (H-8) hook. This size works well with worsted weight yarn to create a fabric that is tight enough to be sturdy but not so tight that it’s difficult to work. Check your yarn label for the recommended hook size if you choose a different yarn.
- Stitch Marker: A small safety pin or a dedicated plastic stitch marker. This is crucial for keeping track of the beginning of your rounds.
- Yarn Needle (or Tapestry Needle): A blunt-tipped needle with a large eye, used for weaving in your yarn ends at the finish.
- Scissors: Any pair will do!
Part 2: Understanding the Basics & Abbreviations
This pattern is written in standard US crochet terminology.
- ch: Chain – The foundation of most crochet projects.
- st(s): Stitch(es)
- sl st: Slip Stitch – Used to join rounds.
- sc: Single Crochet – The primary stitch for this bag.
- […]: Brackets indicate a set of instructions to be repeated.
- (…): Parentheses at the end of a row/round indicate the total stitch count.
A Quick Refresher on the Single Crochet (sc): Insert your hook into the desired stitch, yarn over, pull up a loop (you’ll have two loops on your hook), yarn over again, and pull through both loops on the hook. That’s one single crochet!
The Pattern: Step-by-Step
Let’s begin making our bag!
Step 1: Crocheting the Rectangular Base
We will start by creating a flat rectangle. This will be the bottom of your tote bag. We will work back and forth in rows.
To Start: Make a slip knot and chain 36.
Row 1: sc in the 2nd chain from the hook and in each chain across. At the end of the row, you should have 35 stitches. (35s˜ts)
Row 2: ch1˜, turn your work. sc in the very first stitch and in each stitch across. (35s˜ts)
Rows 3 – 15: Repeat Row 2. After each row, remember to ch1˜ and turn. Your stitch count should always be 35.
After completing Row 15, you will have a solid rectangle measuring approximately 12 inches long by 4 inches wide. Do not fasten off the yarn! We will now begin working on the body of the bag.
(Note: This is a descriptive placeholder for a helpful diagram)
Step 2: Building the Body of the Bag
Now, we will transition from working in rows to working in rounds. We will be crocheting around the entire perimeter of the rectangle you just made. This creates a seamless body.
Round 1 (The Foundation Round):
- ch1˜ (this does not count as a stitch).
- Work along the long edge: Place 1 sc in each of the 35 stitches from your last row.
- Work along the short edge: Turn your work 90 degrees to work along the side of the rows. Place 1 sc in the end of each of the 15 rows. (15s˜ts)
- Work along the other long edge: Turn 90 degrees. Place 1 sc in each of the 35 foundation chain stitches. (35s˜ts)
- Work along the final short edge: Turn 90 degrees. Place 1 sc in the end of each of the 15 rows. (15s˜ts)
- Join to the first sc of the round with a sls˜t.
You should now have a total of 35+15+35+15=100 stitches in your first round. Place your stitch marker in the first stitch of this round to mark the beginning.
Round 2: ch1˜, sc in the same stitch and in every stitch around. Do not join at the end. We will now work in a continuous spiral. (100s˜ts)
Rounds 3 – 45 (or until desired height): Continue to work 1 sc in every single stitch around, moving your stitch marker up at the beginning of each round. Working in a spiral like this eliminates the seam line on the side of your bag.
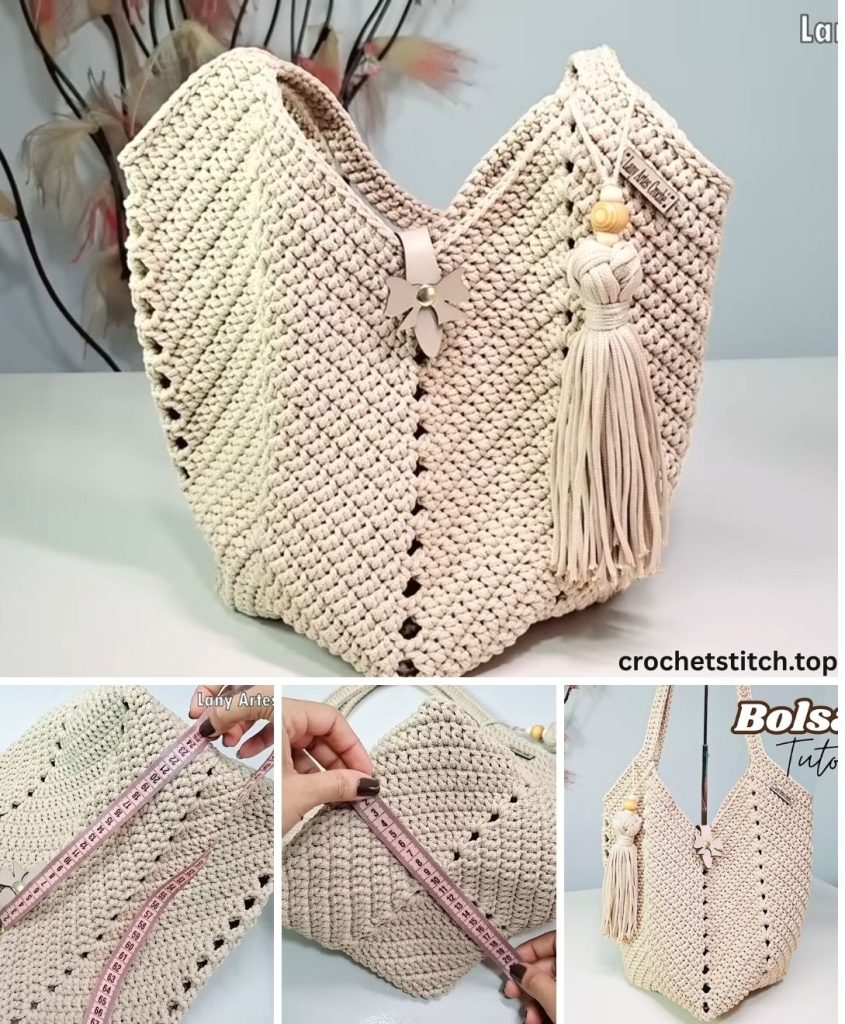
Continue until your bag measures about 13-14 inches tall from the base, or until it reaches a height you like. Don’t make it too tall, or the straps we create next might feel too short.
Once you reach your desired height, stop at the end of a round (where your stitch marker is). Do not fasten off.
Step 3: Creating the Straps
We will now create the handles directly into the body of the bag. This is a simple and strong method.
Round 46 (Strap Creation Round):
- sc in the next 15 stitches.
- Make the first strap: Chain 70. This chain will form the handle. Be careful not to twist your chain.
- Attach the strap: Skip the next 20 stitches on the bag body. Insert your hook into the 21st stitch and make a sc.
- sc in the next 29 stitches (this will take you across the other side of the bag).
- Make the second strap: Chain 70.
- Attach the strap: Skip the next 20 stitches. Insert your hook into the 21st stitch and make a sc.
- sc in the remaining 14 stitches of the round. You should now be back at your stitch marker.
You have now created the basic shape of your straps!
Step 4: Reinforcing the Straps & Finishing
The single chains of the straps need to be reinforced to carry weight. We will do this by crocheting over them.
Round 47: sc in each stitch until you reach the first chain handle. Now, work 70 sc stitches directly into the chain space of the handle (not into the individual chain links, but around the whole chain). This makes the strap thicker and stronger. Continue to sc in each stitch across the bag body until you reach the second chain handle. Work 70 sc stitches into the second chain handle space. sc in the remaining stitches until you reach the beginning of the round.
Rounds 48 – 50: For the final three rounds, simply sc in every single stitch around—including the stitches you just made on the handles. This will seamlessly blend the straps into the top of the bag and add extra durability.
Finishing: After completing Round 50, sls˜t into the next stitch. Cut your yarn, leaving a 6-inch tail. Yarn over and pull the tail completely through the loop on your hook to fasten off.
Using your yarn needle, weave the tail end securely into the inside of the bag. Weave it back and forth in several directions to ensure it doesn’t unravel. Do the same for the initial tail at the base of the bag.
Part 3: Customization & Making It Your Own
Now that you’ve mastered the basic tote, here are some ideas to customize your next one:
- Stripes: Change colors every 2, 5, or 10 rounds to create a fun striped pattern. To change colors cleanly, complete the final yarn-over of the last stitch of the old color with the new color.
- Add a Decorative Border: Instead of the final three rounds of single crochet, try a round of crab stitch (reverse single crochet) or a simple shell stitch for a more decorative top edge.
- Adjust the Size:
- For a wider bag, add more chains to your foundation chain (e.g., start with ch4˜6 for a wider base).
- For a deeper bag, add more rows to the rectangular base (e.g., 20 rows instead of 15).
- For a taller bag, simply add more rounds to the body.
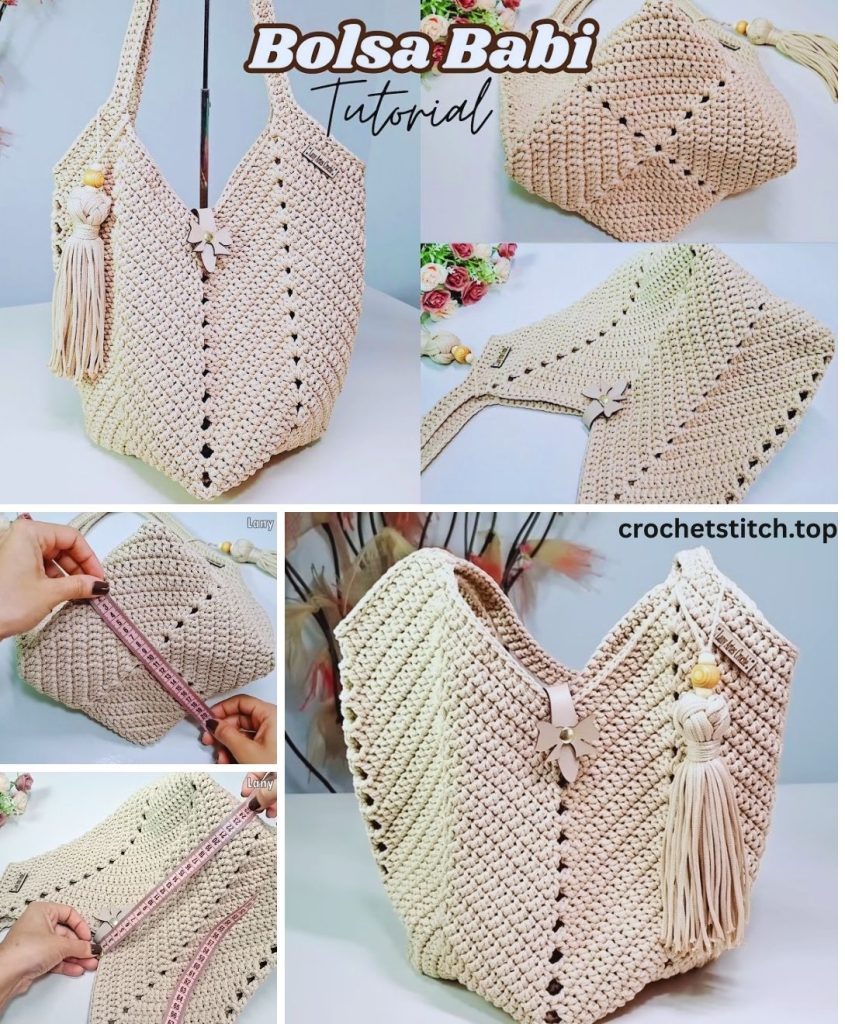
- Tassels or Pompoms: Add a fun yarn tassel or pompom to one of the straps for a pop of personality.
Congratulations on finishing your beautiful, handmade crochet tote bag! You’ve taken yarn and a hook and transformed them into a functional piece of art. We hope you enjoy using it as much as you enjoyed making it. Happy crocheting!