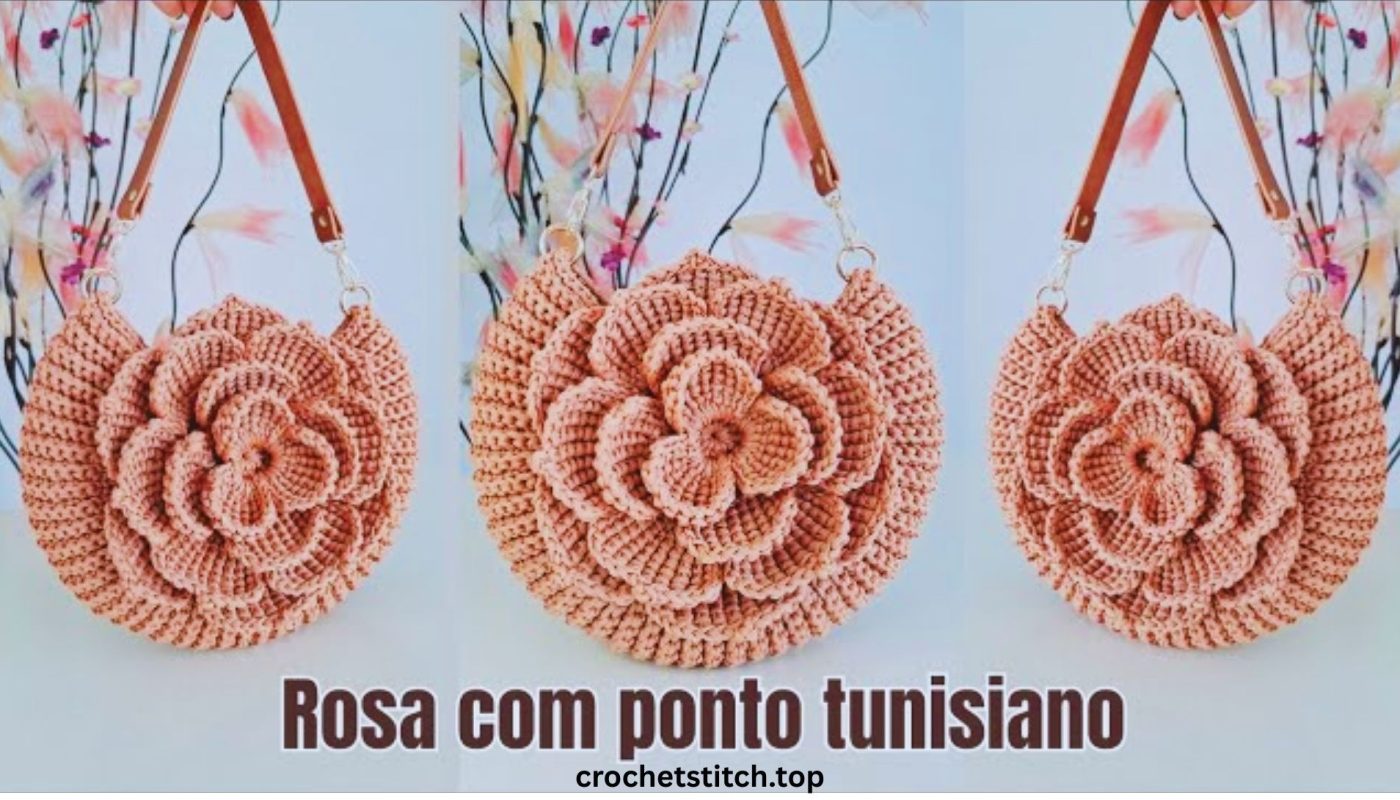
 by
by This is a wonderful project that combines the unique, woven-like texture of Tunisian crochet with the beauty of floral colorwork. This guide is designed to be a comprehensive tutorial, walking you through every detail, from the fundamental Tunisian stitches to constructing the final bag.
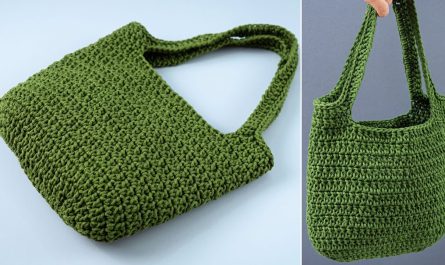
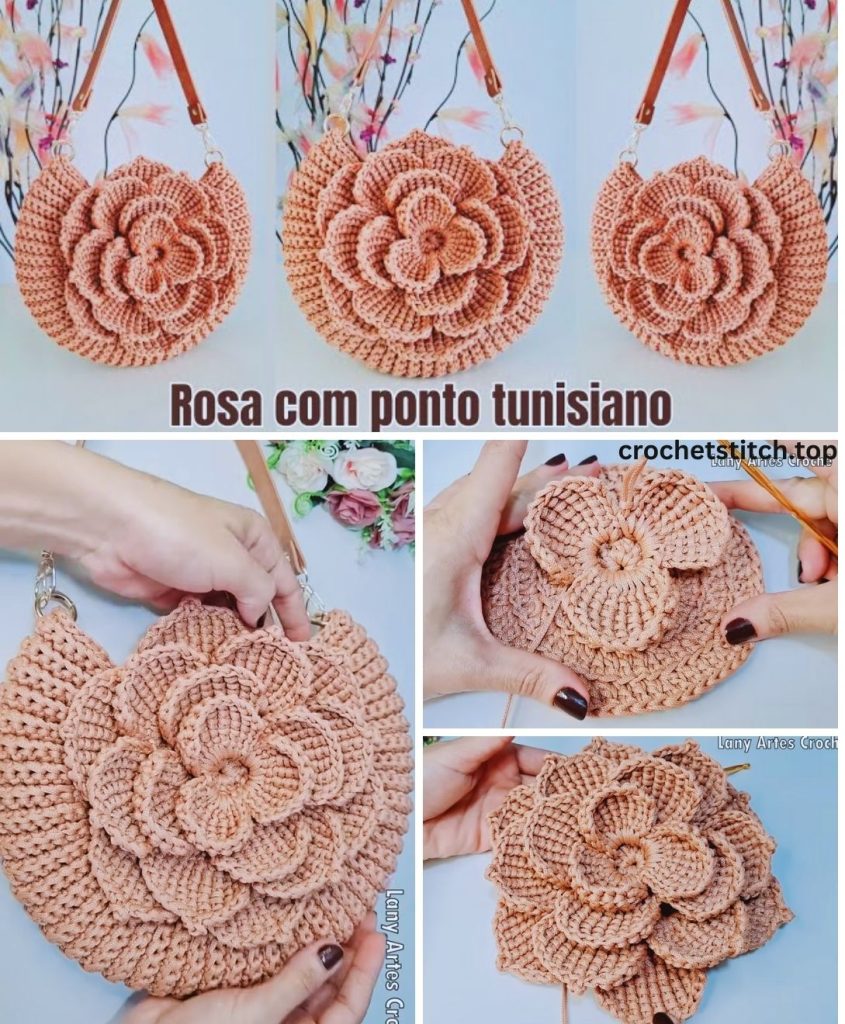
How to Create a Stunning Flower Tote Bag with Tunisian Crochet: A Step-by-Step Pattern
Tunisian crochet, sometimes called Afghan crochet, is a beautiful niche of yarn craft that blends elements of both knitting and crochet. It creates a dense, stable, and uniquely textured fabric that is absolutely perfect for a sturdy and stylish tote bag. The square-like grid of the stitches also serves as the perfect canvas for colorwork, allowing us to create a striking floral design.
This pattern will guide you through making a flat panel featuring a modern flower motif using the Tunisian Simple Stitch. We will then assemble this panel into a chic tote bag, add a sturdy base, and finish it with elegant straps. While this project is a step up from basic crochet, a determined beginner with a little patience can certainly master it.
Why Tunisian Crochet is Perfect for This Bag
- Dense Fabric: The fabric created is much less porous than standard crochet, meaning you likely won’t need a fabric lining. Your belongings will stay secure.
- Minimal Stretch: Unlike many crochet stitches, Tunisian crochet has very little vertical stretch, ensuring your bag holds its shape beautifully over time.
- A Canvas for Art: The grid-like structure of the stitches is ideal for tapestry or intarsia crochet, allowing for clean, pixel-art-like designs.
- Unique and Impressive: This technique produces a result that looks sophisticated and complex, and you’ll love being able to say, “I made this!”
Part 1: Essential Skills & Concepts
Before we begin, let’s understand the basics. You will need a special Tunisian crochet hook, which is a long hook with a stopper at the end, or a hook with an interchangeable cable.
The Two-Step Process: Every row in Tunisian crochet is completed in two passes:
- Forward Pass (FwP): You work from right to left, picking up loops and loading them onto your hook.
- Return Pass (RetP): You work from left to right, working the loops off your hook to complete the row.
The Tunisian Simple Stitch (TSS): This is the foundational stitch we will use.
- To make a TSS (on the Forward Pass): Skip the very first vertical bar of the row. Insert your hook from right to left under the next front vertical bar, yarn over, and pull up a loop. Keep this loop on your hook. Repeat this for every stitch across the row.
Standard Return Pass (RetP): This is the standard way to work the loops off your hook.
- To begin, yarn over and pull through the first loop only on your hook. (This creates the edge stitch).
- For the rest of the pass, [yarn over, pull through two loops] on your hook. Repeat this process until only one loop remains on your hook. That final loop is the first stitch of your next row.
Changing Colors (Intarsia Method): For our flower design, we’ll change colors within the row.
- When you are ready to change from Color A to Color B, work the final stitch in Color A. To pull up the loop for that stitch, drop Color A and pick up Color B, pulling the loop of the new color through.
- To keep the back tidy, it’s best to use separate small balls or “bobbins” of yarn for each color section. Do not carry your yarn across the back for more than a couple of stitches.
Part 2: Gather Your Materials
- Yarn: Worsted Weight (Category 4) Cotton Yarn. Cotton is recommended for its sturdiness.
- Background Color (B): Approx. 350 yards. (e.g., Cream or Light Gray)
- Stem/Leaf Color (S): Approx. 50 yards. (e.g., Sage Green)
- Petal Color (P): Approx. 75 yards. (e.g., Dusty Rose, Mustard Yellow, or Coral)
- Tunisian Crochet Hook: A 6.0mm (J-10) hook, or one size larger than your yarn recommends. Tunisian crochet creates a dense fabric, so sizing up your hook prevents it from becoming too stiff.
- Regular Crochet Hook: A 5.0mm (H-8) hook for creating the base and straps.
- Yarn Needle: For seaming and weaving in ends.
- Scissors.
- Stitch Markers (optional).
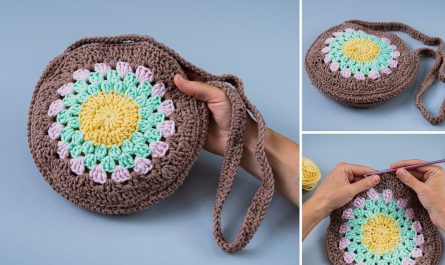
Part 3: The Flower Chart & Pattern
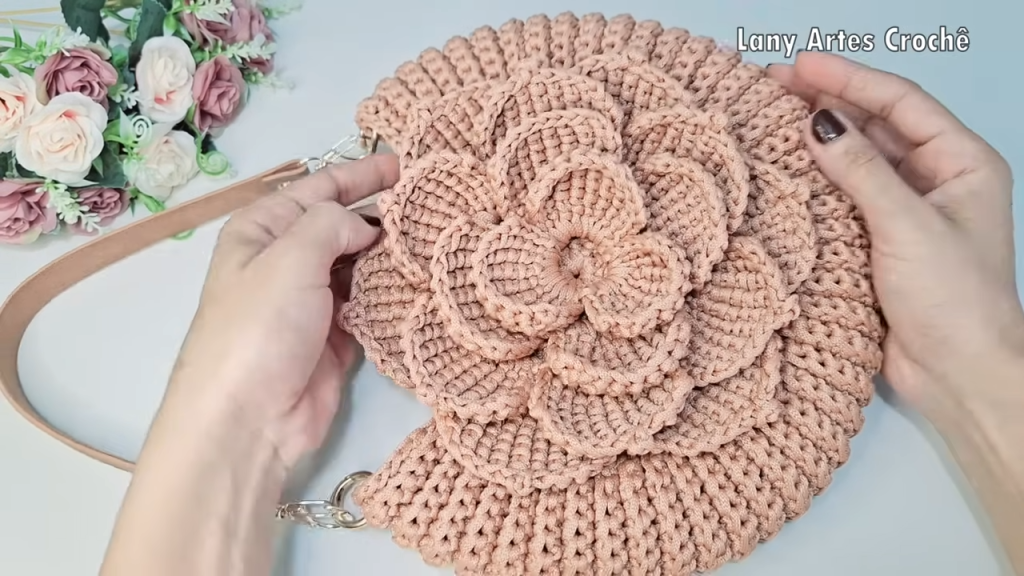
We will create one long panel that will be folded in half to form the bag. The flower design will appear on one side.
Flower Chart (35 stitches wide x 30 rows tall): Read the chart from bottom to top, right to left for each row’s Forward Pass. Each square represents one Tunisian Simple Stitch (TSS).
Row 30: [B] [B] [B] [B] [P] [P] [P] [P] [P] [P] [P] [B] [B] [B] ... (and so on, all B)
Row 29: [B] [B] [B] [P] [P] [P] [P] [P] [P] [P] [P] [P] [B] [B] ...
Row 28: [B] [B] [P] [P] [P] [B] [B] [B] [B] [P] [P] [P] [B] ...
... and so on for the entire flower design.
(This is a descriptive placeholder for a visual chart. A simple tulip or daisy chart would be used here. Below is a written-out pattern based on a simple tulip concept.)
Let’s imagine a simple, centered tulip design that is 15 stitches wide at its widest point. Our panel will be 45 stitches wide.
Step 1: The Main Body Panel
With your Tunisian hook and Background Color (B), let’s begin.
Foundation Row:
- ch4˜5.
- FwP: Insert hook in the 2nd ch from the hook, yarn over, pull up a loop. [Insert hook in next ch, yarn over, pull up a loop] across the entire chain. You should have 45 loops on your hook.
- RetP: Work a standard Return Pass.
Rows 2 – 15:
- FwP: Work a TSS in each vertical bar across. (45 loops on hook)
- RetP: Standard Return Pass.
- At the end of Row 15, you are ready to begin the colorwork.
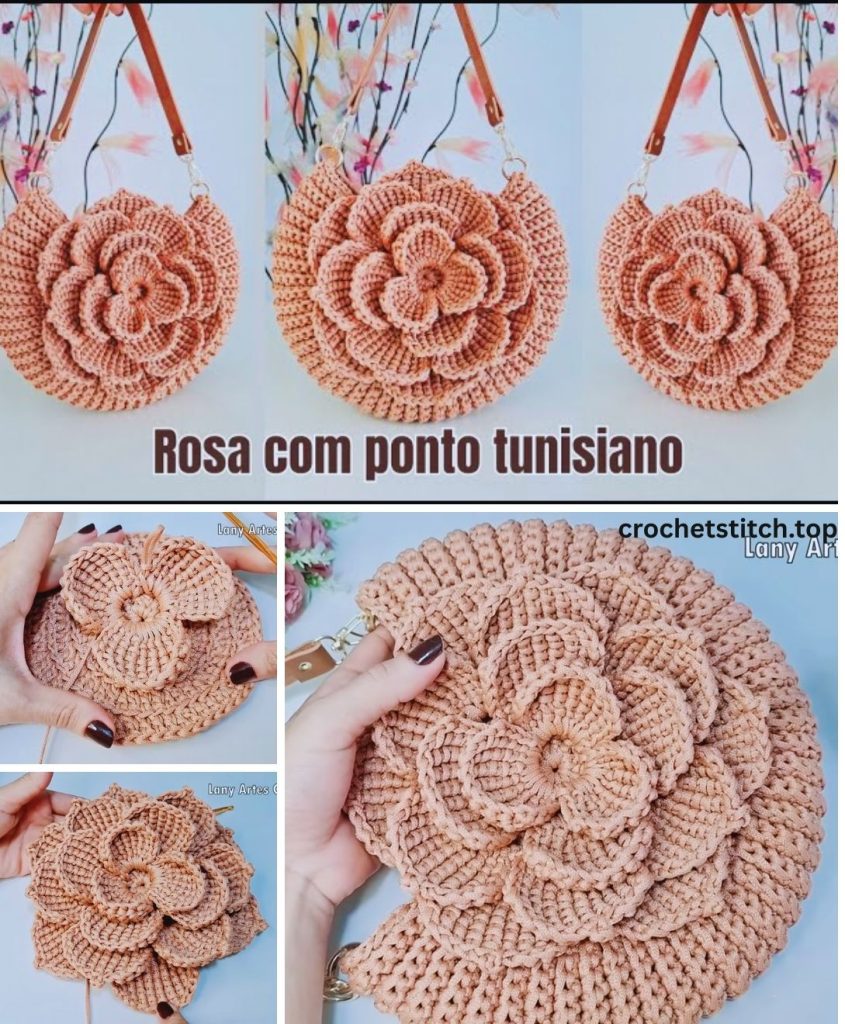
Rows 16 – 45 (Flower Chart Section): Prepare small bobbins of your Stem (S) and Petal (P) colors. Follow the instructions for each row’s Forward Pass. The Return Pass is always the standard RetP, making sure to match the color of the yarn to the loops below it when you have multiple colors on the hook in one go.
- Row 16 (Chart Row 1): FwP: TSS2˜1 in B, TSS3˜ in S, TSS2˜1 in B.
- Row 17 (Chart Row 2): FwP: TSS2˜1 in B, TSS3˜ in S, TSS2˜1 in B.
- Row 18 (Chart Row 3): FwP: TSS1˜9 in B, TSS2˜ in S, TSS1˜ in B, TSS2˜ in S, TSS2˜1 in B. (This creates a small leaf)
- …Continue following your visual chart row by row. A typical progression would be to continue the stem, add leaves, and then build the flower head/petals.
- Example Petal Row: FwP: TSS1˜5 in B, TSS1˜5 in P, TSS1˜5 in B.
Rows 46 – 80:
- Once you have completed the 30 rows of the flower chart, cut your S and P yarns, leaving tails to weave in later.
- Continue working in only the Background Color (B).
- Work 35 more rows of standard TSS (or until the plain section matches the length of the section before the flower chart). This will create the back of your bag.
Bind Off Row: After your final row, you need to create a finished edge.
- Insert your hook as you would for a TSS in the next vertical bar, yarn over, pull up a loop, and then pull that same loop through the loop on your hook (a slip stitch).
- Repeat this slip stitch bind-off in each vertical bar across.
- Fasten off, leaving a very long tail (approx. 30 inches) for seaming.
Your finished panel may curl. This is normal! Seaming and use will flatten it, or you can steam block it lightly before assembly.
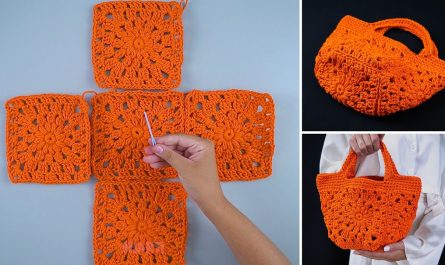
Step 2: Assembly & Seaming
- Lay your long panel flat, with the flower design (the “right side”) facing up.
- Fold the bottom edge (your starting edge) up to meet the top edge (your bind-off edge). The flower should be on the outside front of the bag.
- Using the long tail and your yarn needle, seam up one side of the bag. A whip stitch or mattress stitch will create a strong, clean seam.
- Cut a new length of yarn and seam the other side of the bag.
- Turn the bag right-side out.
Step 3: Creating a Flat Base (Optional, but Recommended)
A flat bottom gives the bag structure.
With your regular 5.0mm hook and Background Color:
- ch3˜6.
- Row 1: sc in 2nd ch from hook and across. (35s˜c)
- Row 2-15: ch1˜, turn. sc in each stitch across. (35s˜c)
- Fasten off, leaving a long tail for sewing.
- Place this rectangle at the bottom of your bag (on the inside) and use the tail and your yarn needle to carefully whip stitch it to the foundation rows of the bag body.
Step 4: Making and Attaching the Straps
Sturdy straps are essential. We will make them separately with standard crochet.
With your regular 5.0mm hook and Petal Color (P) or Background Color (B):
- ch7˜.
- Row 1: sc in 2nd ch from hook and across. (6s˜c)
- Row 2: ch1˜, turn. sc in the back loop only of each stitch across. (6s˜c)
- Repeat Row 2 until your strap measures your desired length (approx. 20-22 inches is a good shoulder strap length).
- Fasten off, leaving a long tail for sewing.
- Repeat to make a second strap.
Attachment:
- Pin the straps to the inside top edge of your bag. A good placement is about 3 inches in from each side seam.
- Using the long tails and your yarn needle, sew the straps securely to the bag. For maximum strength, sew them on in a square shape with an “X” through the middle.
Part 4: Finishing Touches
The most crucial final step is to turn your bag inside out and meticulously weave in all the yarn ends from your colorwork and seaming using your yarn needle. This secures your work and gives the inside a clean, professional finish.
Congratulations! You have created a truly unique and beautiful Tunisian crochet tote bag. You have not only made a functional accessory but have also mastered a new technique, practiced your colorwork skills, and created a piece of fiber art that is sure to turn heads.