 by
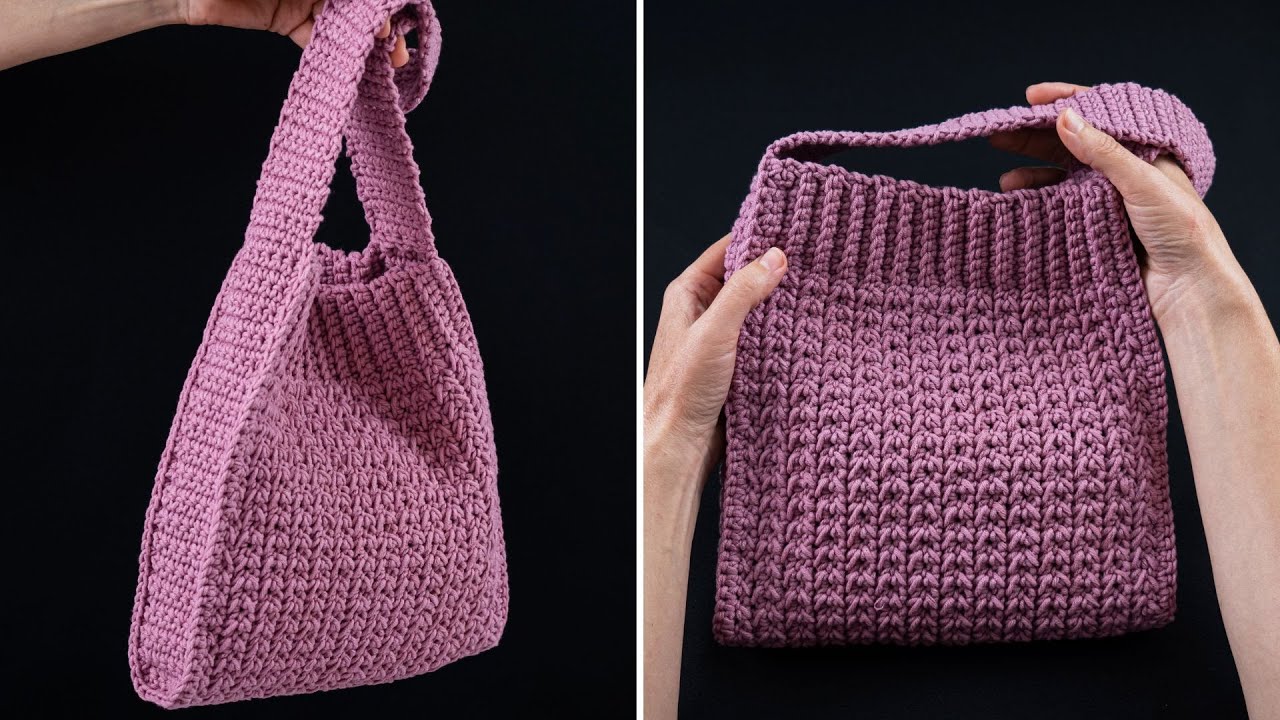
by Welcome to the wonderful world of crochet! If you’re looking for the perfect project to move beyond simple squares and scarves, you’ve found it. A crochet tote bag is not only stylish and practical but is also an incredibly rewarding project for a beginner. It’s large enough to feel like a significant accomplishment but simple enough in its construction to be completely achievable.
This detailed guide will walk you through every single step, from choosing your yarn to weaving in the final end. We’ll use basic stitches and a straightforward construction method to create a sturdy, elegant, and eco-friendly bag you’ll be proud to carry everywhere.
Why This is the Perfect Beginner Project
- Uses Basic Stitches: This entire bag is made primarily with the single crochet stitch, one of the first stitches every crocheter learns.
- Simple Construction: It’s built from the bottom up, starting with a simple rectangular base and then working the body in seamless rounds. No complicated joining of panels!
- Forgiving and Meditative: The repetitive nature of the stitches is relaxing and allows you to build confidence and find your rhythm. Unlike a sweater or a hat, the exact size isn’t critical, so there’s less pressure.
Before You Begin: Gathering Your Supplies
Let’s get everything you need lined up before you make your first stitch.
Materials & Tools:
- Yarn: Approximately 400-450 yards of Worsted Weight (Category 4) cotton or a cotton-blend yarn.
- Why Cotton? Cotton is the ideal choice for a bag because it’s strong, durable, and has very little stretch, meaning your bag won’t sag when you fill it with your belongings. A solid, light color is recommended for your first bag as it makes it easier to see your stitches.
- Crochet Hook: A 5.0mm (H-8) crochet hook. This size works perfectly with worsted-weight yarn to create a dense, sturdy fabric.
- Stitch Markers: At least two, but four is helpful. These are little lifesavers for marking stitches, especially in the beginning.
- Tapestry Needle: A large, blunt-ended needle for professionally weaving in your yarn tails at the end.
- Scissors: A sharp pair for snipping your yarn.
Understanding Gauge
Gauge is the measurement of how many stitches and rows you have in a certain area (e.g., a 4×4 inch square). For clothing, gauge is critical. For a tote bag, it’s much more relaxed! However, it’s good practice to be aware of it.
- Our Gauge: Approximately 14 single crochet stitches and 16 rows = 4 inches (10 cm).
- Don’t stress if you’re a little off. If your stitches are much looser, your bag will be bigger and more flexible. If they’re much tighter, it will be smaller and stiffer. The most important thing is to be consistent with your tension.
Essential Stitches & Abbreviations (US Crochet Terms):
This pattern uses US crochet terminology.
- ch: chain – To make a chain, yarn over your hook and pull the yarn through the loop that is on your hook.
- st(s): stitch(es) – Refers to any crochet stitch you make.
- sl st: slip stitch – Insert your hook into the stitch, yarn over, and pull the yarn through both the stitch and the loop on your hook in one motion. Used for joining.
- sc: single crochet – Insert your hook into the stitch, yarn over and pull up a loop (you’ll have 2 loops on your hook). Yarn over again and pull through both loops on your hook.
- inc: increase – To work 2 single crochet stitches into the very same stitch. This makes your project wider.
- (…): The number in parentheses at the end of a round is your total stitch count for that round.
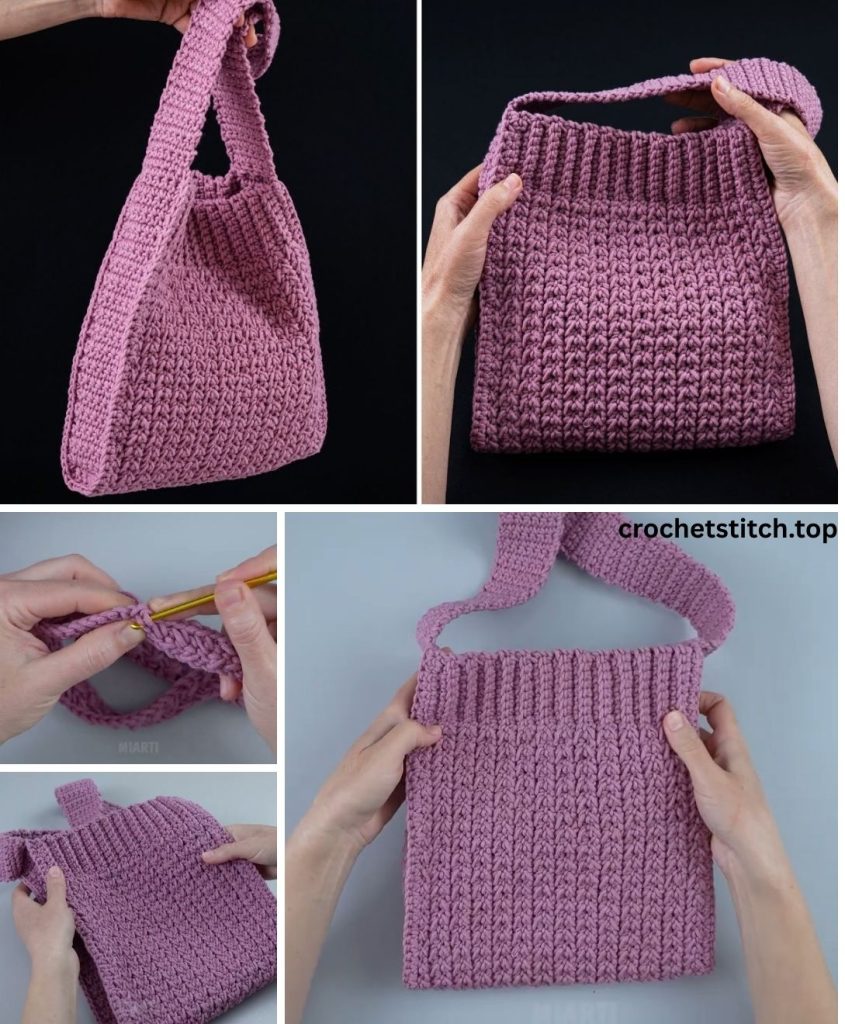
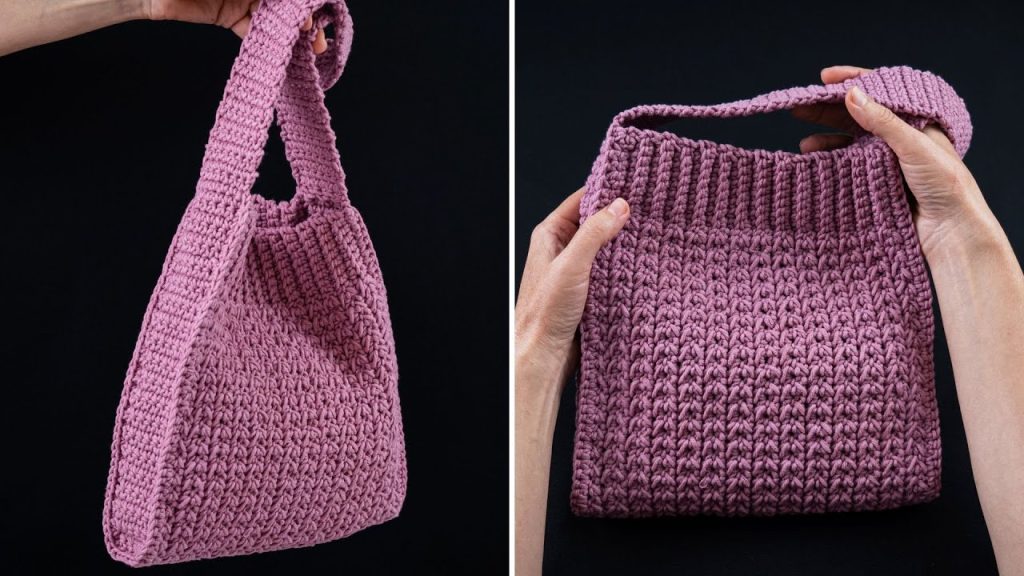
The Tote Bag Pattern: Step-by-Step
Our tote bag is made in three simple parts:
- The Base: A flat, sturdy rectangle that forms the bottom.
- The Body: The walls of the bag, worked upwards in rounds.
- The Straps: Created and attached directly to the body for strength.
Part 1: The Base
We’ll begin by making a foundation chain and then working in rounds around both sides of it to create a seamless, oval-shaped rectangle.
Let’s start!
Foundation Chain: Ch 31.
Round 1:
- Work 1 sc in the 2nd ch from the hook.
- Work 1 sc in the next 28 chains.
- Work 3 sc all into the very last chain. This will turn you around the corner. (Beginner Tip: Place a stitch marker in the 2nd of these 3 stitches. This marks the center of your curve.)
- Now, working along the other side of the foundation chain, work 1 sc in the next 28 stitches.
- Work 2 sc in the very last stitch (this is the same space as your very first sc of the round).
- Join to the first sc with a sl st. (62 sts)
Round 2:
- Ch 1 (this does not count as a stitch).
- Work an inc (2 sc) in the very first st.
- Work 1 sc in the next 28 sts.
- Work an inc in each of the next 3 sts (this is the curve at the end).
- Work 1 sc in the next 28 sts.
- Work an inc in each of the last 2 sts.
- Join to the first sc with a sl st. (68 sts)
Round 3:
- Ch 1.
- 1 sc in the first st, inc in the next st.
- 1 sc in the next 28 sts.
- [1 sc in the next st, inc in the next st] repeat 3 times.
- 1 sc in the next 28 sts.
- [1 sc in the next st, inc in the next st] repeat 2 times.
- Join to the first sc with a sl st. (74 sts)
Round 4 – 7 (or until base is desired width): Continue in this pattern, increasing at the corners. For each round, you will add one more single crochet between the increases on the curved ends. Continue until your base is about 3-4 inches wide.
Your final stitch count for Round 7 should be 98 sts.
Part 2: The Body
Now that the base is done, the rest is easy! We will simply work in rounds without any more increases, which will cause the sides of the bag to grow upwards.
Transition Round 8: Ch 1. Work 1 sc in the Back Loop Only (BLO) of each stitch around. Join with a sl st to the first sc. (98 sts)
- Why BLO? Working in the back loop for just this one round creates a beautiful, sharp, defined edge between the base and the body of your bag, giving it a very professional look.
Body Rounds 9 – 45 (or until desired height): Ch 1. Work 1 sc in both loops of every stitch around. Join with a sl st to the first sc. (98 sts)
- This is the meditative part! Just keep going round and round. Put on your favorite music or podcast. Try your bag on for size as you go. A good height for a tote is usually around 12-15 inches, but you can make it as tall or short as you like!
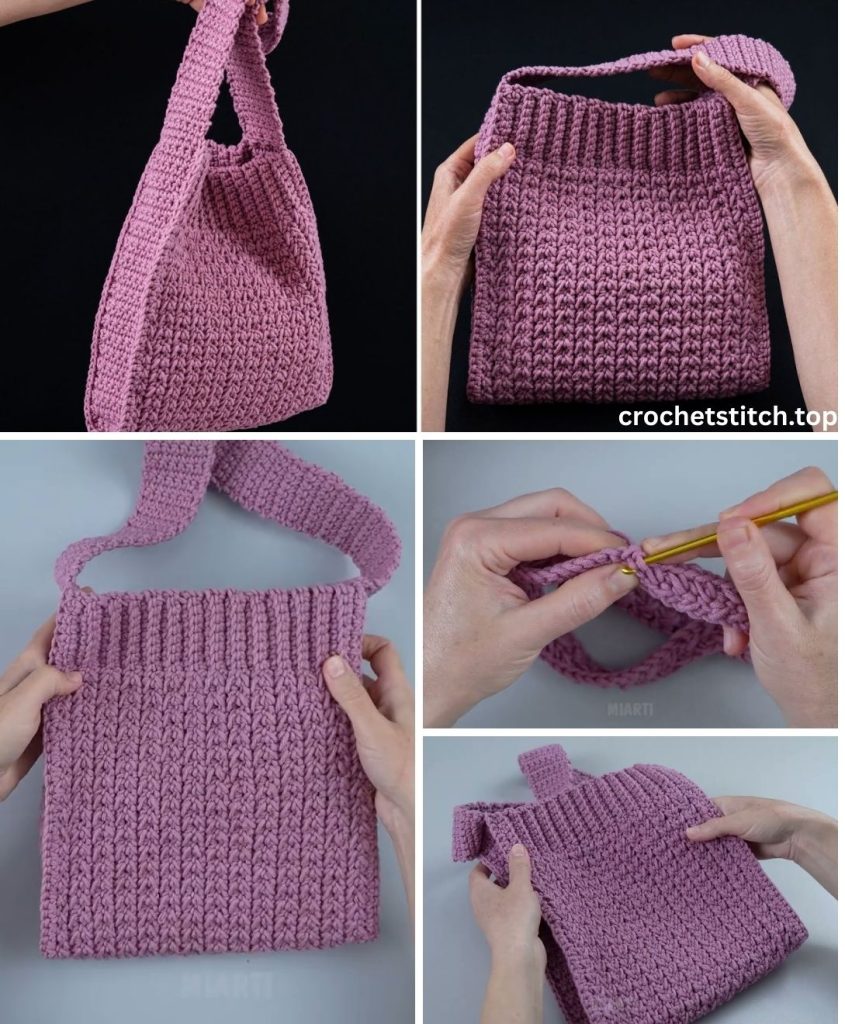
Part 3: The Straps
We will create the straps directly onto the bag body. This method is simple, seamless, and very strong.
Positioning the Straps:
- Lay your bag flat. Place a stitch marker on each side to mark the “folds” or corners.
- From the right-side stitch marker, count 10 stitches towards the front of the bag and place a new stitch marker (Marker A).
- From Marker A, count 29 stitches across the front and place another marker (Marker B). This 29-stitch section is where your first strap will attach.
- Repeat on the back side of the bag. You should have 20 stitches between the straps on each side of the bag.
Round 46 (Strap Creation):
- Ch 1, sc in each stitch until you reach Marker A.
- Make the strap: Ch 60. (For longer straps, chain 70-80. For shorter handles, chain 40-50). Be careful not to twist your chain!
- Skip all the stitches between Marker A and Marker B.
- Sc into the stitch at Marker B.
- Continue to sc around the side and back of the bag until you reach the next marker for the second strap.
- Repeat the process: Ch 60, skip the 29 stitches, and sc into the marked stitch.
- Sc in the remaining stitches until you reach the beginning of the round. Join with a sl st.
Rounds 47 – 50 (Reinforcing the Straps): To make the straps sturdy and comfortable, we will now work a few more rounds of single crochet all the way around the bag, including over the chain spaces you just made.
- For the next 3-4 rounds, simply Ch 1 and work 1 sc in every single stitch around the top of the bag.
- When you get to the chain for the strap, work 1 sc into each chain stitch.
- Continue this for 3 or 4 rounds, or until the straps feel thick and strong enough for you.
Finishing Touches: The Professional Polish
You are so close to being done! These last steps make all the difference.
- Fasten Off: After your final round of single crochet, sl st into the next stitch. Cut the yarn, leaving a 6-inch tail. Yarn over and pull the tail all the way through the loop on your hook to secure it.
- Weave in Your Ends: Thread the yarn tail onto your tapestry needle. Weave the needle back and forth through the inside stitches of your bag. Go in at least three different directions to make sure it’s secure and won’t come undone. Trim the excess yarn. Do the same for the starting tail at the base of the bag.
Congratulations! You’ve made a tote bag!
Step back and admire your work. You have turned a ball of yarn into a beautiful, functional, and handmade item. Be proud of what you’ve created and get ready to receive compliments everywhere you go!