 by
by Of course! Here is a detailed, beginner-friendly guide to creating an amazing and unique summer bucket hat using only your leftover yarn scraps. This long-form tutorial will walk you through every step of the process.
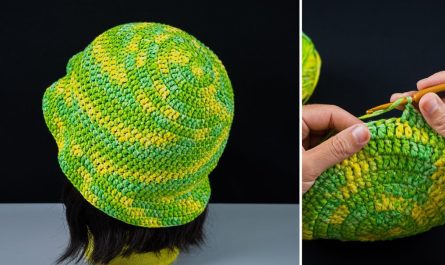
Create an Amazing Summer Bucket Hat from Yarn Scraps! An Easy Step-by-Step Crochet Pattern for Beginners
Welcome, creative crafter! Do you have a growing collection of leftover yarn balls that are too small for a big project but too precious to throw away? It’s time to bust that stash and turn those colorful scraps into your new favorite accessory: a one-of-a-kind, eco-friendly, and incredibly stylish scrappy bucket hat!
This project is perfect for beginners. It’s low-pressure, endlessly customizable, and uses the most basic crochet stitches. There are no “wrong” color combinations—the more random and colorful, the better! We will guide you through every single step to ensure you create a beautiful hat you’ll be proud to wear all summer long.
Why a “Scrappy” Hat is the Perfect Beginner Project
- Stress-Free Colorwork: You’ll learn how to change colors without any complicated techniques. Every hat will be completely unique!
- Budget-Friendly & Sustainable: You get to use up materials you already have, reducing waste and saving money.
- Builds Confidence: This project is a fantastic way to practice your tension and stitching in the round, resulting in a fun, wearable item that doesn’t need to be “perfect” to look amazing.
Before You Begin: The “Scrappy” Prep
A little preparation will make the crocheting process smooth and enjoyable.
1. Gather Your Scraps!
Raid your yarn stash! The most important rule is to try and use yarns that are all the same weight. For this pattern, we recommend using Worsted Weight (Category 4) yarn. Mixing different weights (like a chunky yarn with a very thin one) can cause your hat to pucker and have uneven tension.
- Tip: Don’t worry about having enough of any one color. We’ll be changing colors frequently!
2. Materials & Tools
- Yarn: A collection of Worsted Weight (Category 4) yarn scraps. You’ll need about 200 yards in total.
- Crochet Hook: A 5.0mm (H-8) hook. This is a standard size for worsted weight yarn and will create a fabric that’s dense enough to hold its shape.
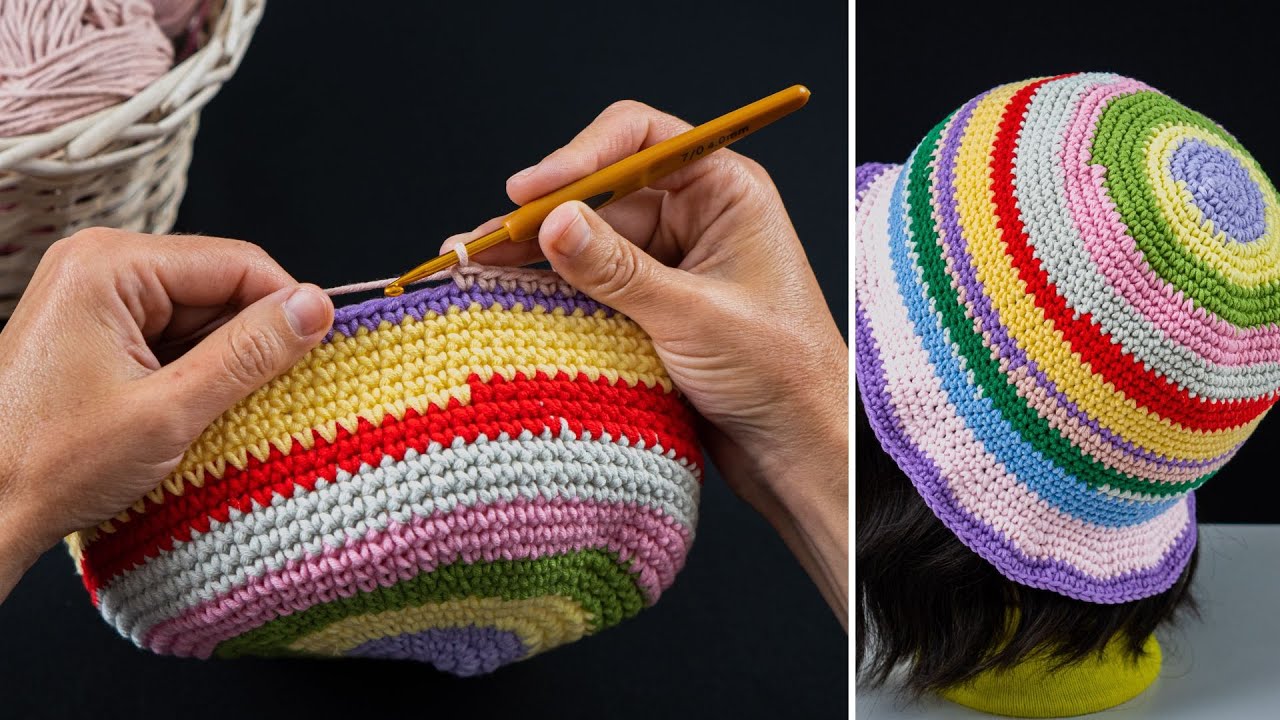
- Stitch Marker: This is essential! We will be working in a continuous spiral, and a stitch marker is the only way to know where your round begins and ends.
- Tapestry Needle: For neatly weaving in all those colorful ends.
- Scissors: For snipping yarn as you change colors.
3. A Note on Gauge
Gauge refers to the density of your stitches. While it’s less critical for a scrappy hat than for a fitted sweater, it’s still important for sizing. The best way to check your size for this project is to measure the crown as you go. We will guide you on this in the pattern below.
4. Abbreviations & Stitches (US Crochet Terms)
- st(s): stitch(es)
- ch: chain
- sl st: slip stitch
- sc: single crochet
- hdc: half double crochet
- inc: increase (working 2 stitches into the same stitch)
- MR: magic ring (or magic circle)
- FLO: front loop only
- (…): The number in parentheses is the total stitch count for that round.
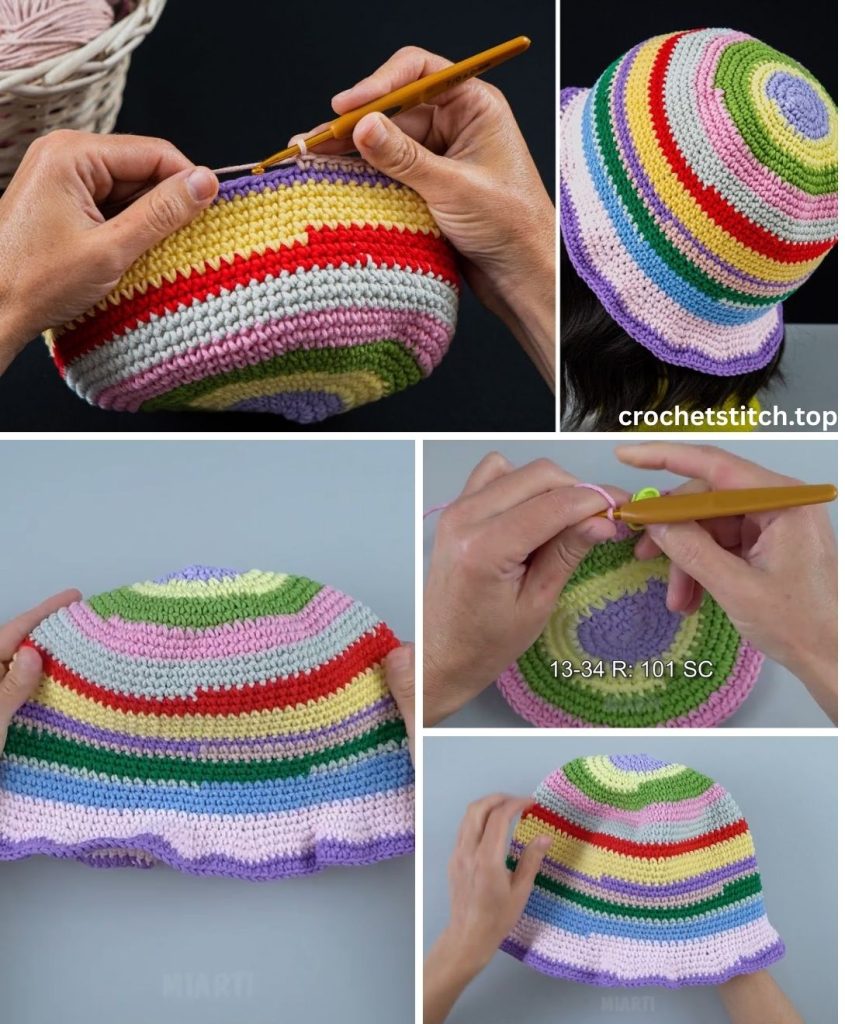
The Pattern: Your One-of-a-Kind Bucket Hat
Our hat is made from the top down in three easy parts: The Crown, The Body, and The Brim.
A Note on Changing Colors
This is where the fun begins! You can change colors whenever you want—every few stitches, every round, or whenever one scrap runs out. Here’s the cleanest way to do it:
- Work the last stitch of your old color until the final “yarn over.” You will have two loops on your hook for an SC, or three loops for an HDC.
- Drop the old color.
- Yarn over with your new color and pull it through all the loops on the hook to complete the stitch.
- Give the old and new yarn tails a gentle tug to tighten. You can crochet over these tails for a few stitches to secure them before trimming, or leave them to weave in later.

Part 1: The Crown (The Colorful Top Circle)
We’ll use half double crochet (hdc) for the crown and body as it works up a bit faster. Remember to place your stitch marker in the very first stitch of each round and move it up as you go!
Round 1: Create a MR and work 8 hdc into the ring. (8 sts)
Round 2: Work an inc in each st around (2 hdc in every stitch). (16 sts)
Round 3: [1 hdc in the next st, inc in the next st] repeat 8 times around. (24 sts)
Round 4: [1 hdc in the next 2 sts, inc in the next st] repeat 8 times around. (32 sts)
Round 5: [1 hdc in the next 3 sts, inc in the next st] repeat 8 times around. (40 sts)
Round 6: [1 hdc in the next 4 sts, inc in the next st] repeat 8 times around. (48 sts)
Round 7: [1 hdc in the next 5 sts, inc in the next st] repeat 8 times around. (56 sts)
Round 8: [1 hdc in the next 6 sts, inc in the next st] repeat 8 times around. (64 sts)
Sizing Checkpoint: This is Important!
Lay your flat circle down and measure its diameter (the distance straight across the middle). This measurement determines if the hat will fit.
- Average Adult Head (21-23″): Your crown should measure about 6.5 – 7 inches in diameter. Round 8 should be about right.
- Teen/Small Adult (20-21″): Your crown should be about 6 – 6.5 inches. You may want to stop after Round 7.
- Child (19-20″): Your crown should be about 5.5 – 6 inches. You may want to stop after Round 6.
If your crown is still too small, simply continue the pattern for another round (e.g., Round 9 would be [1 hdc in the next 7 sts, inc]). Once your crown reaches the correct diameter, you are ready for Part 2!
Part 2: The Body (Building the Sides)
This is the easiest part! To make the sides of the hat, you simply stop increasing. This will cause your work to curve downwards naturally.
Body Rounds (e.g., Rounds 9 – 22): Work 1 hdc in every single stitch around. (64 sts, or your final stitch count from the crown)
- Continue working even rounds with no increases. Keep changing colors as you please!
- The body of the hat should be about 3.5 – 4 inches deep. The best way to check is to try it on! The edge should sit just above your eyebrows.
- Once you’re happy with the depth, you’re ready to create the brim.
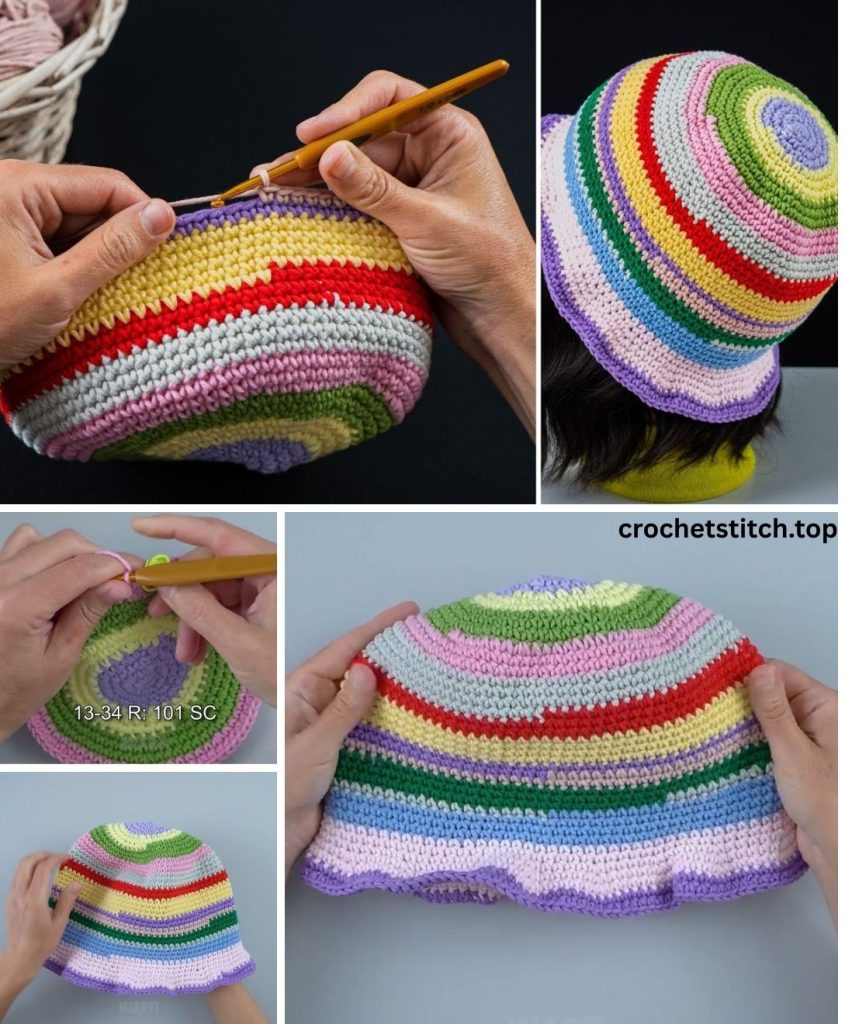
Part 3: The Brim (The Final Flare)
To give the brim a slightly denser and stiffer feel, we will switch to single crochet (sc) stitches.
Transition Round (FLO): This round creates a nice, defined angle for your brim. Work 1 sc in the Front Loop Only (FLO) of each stitch around. (64 sts)
Brim Round 1 (Increase): Now working through both loops as normal, [1 sc in the next 7 sts, inc in the next st] repeat 8 times around. (72 sts)
Brim Round 2: Work 1 sc in each st around. (72 sts)
Brim Round 3 (Increase): [1 sc in the next 8 sts, inc in the next st] repeat 8 times around. (80 sts)
Brim Round 4: Work 1 sc in each st around. (80 sts)
Brim Round 5 (Increase): [1 sc in the next 9 sts, inc in the next st] repeat 8 times around. (88 sts)
Brim Round 6: Work 1 sc in each st around. (88 sts)
- Want a wider brim? Simply continue this pattern of one increase round followed by one plain round until the brim is the width you love!
Final Edging Round: To create a clean, finished edge, work 1 sl st in each st around.
Finishing Touches: The Professional Polish
You’re so close! A neat finish is what makes a project look truly handmade with love.
- Fasten Off: Cut your final yarn color, leaving a 6-inch tail. Yarn over and pull the tail completely through the loop on your hook to knot it.
- Weave In Those Ends: This is the most crucial step for a scrappy project. Thread each yarn tail onto your tapestry needle. Weave the needle under the stitches on the inside of the hat, going back and forth a few times to secure it before trimming the excess. Yes, it takes time, but it’s worth it!
You Did It!
Congratulations! You have successfully transformed a pile of forgotten scraps into a vibrant, stylish, and completely unique summer bucket hat. Wear it with pride to the beach, the park, or just out and about. You not only made a fashion statement but also made a sustainable choice. Happy crocheting!