 by
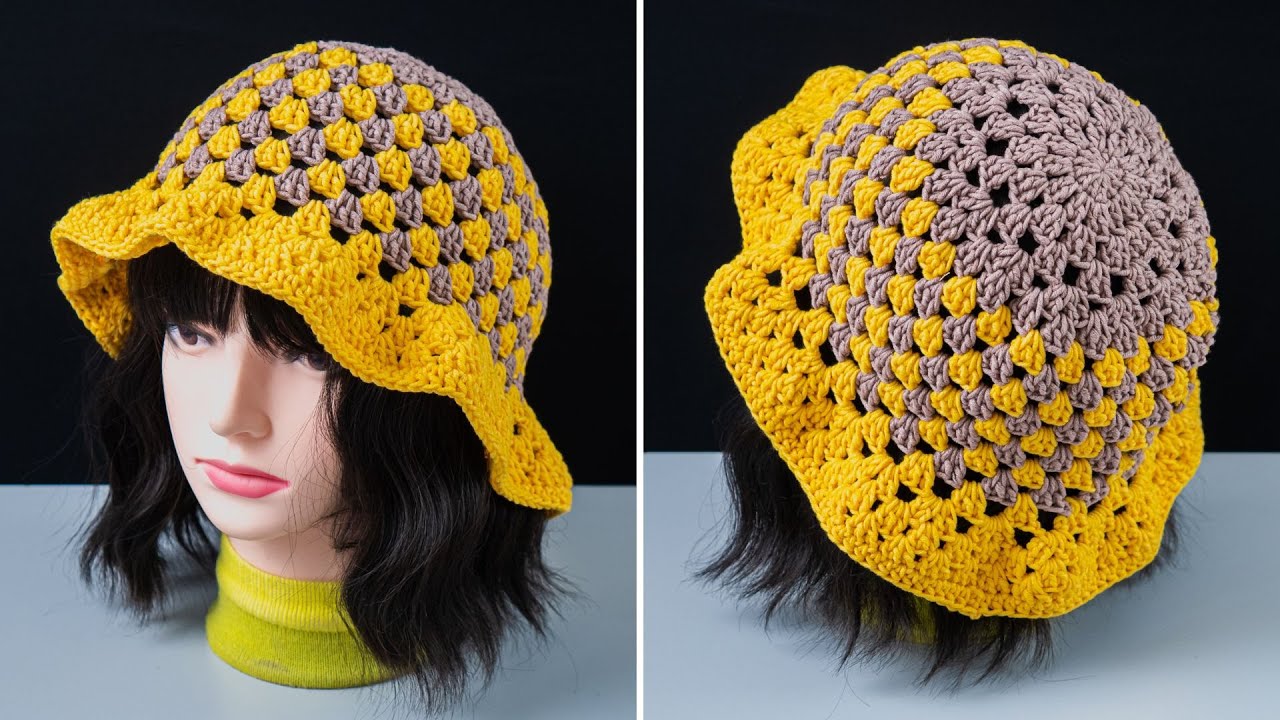
by The crochet granny square bucket hat is a perfect blend of a classic crochet motif with a trendy, modern accessory. It’s a fun and rewarding project that allows for endless color combinations and is great for using up leftover yarn. This detailed tutorial will walk you through each step, from crocheting the individual granny squares to assembling them into a stylish and functional hat.
Materials You’ll Need
- Yarn: Approximately 100-150 grams of worsted weight (aran/10-ply) or DK (8-ply) yarn in a variety of colors. Cotton or cotton-blend yarn is highly recommended for a hat that’s breathable and holds its shape.
- Crochet Hook: A hook size appropriate for your chosen yarn, typically a 4.0mm (G/6) or 5.0mm (H/8) hook.
- Scissors
- Yarn Needle (Tapestry Needle): Essential for weaving in ends and seaming the squares together.
- Stitch Markers: Helpful for marking corners and keeping your place.
Part 1: Crocheting the Granny Squares
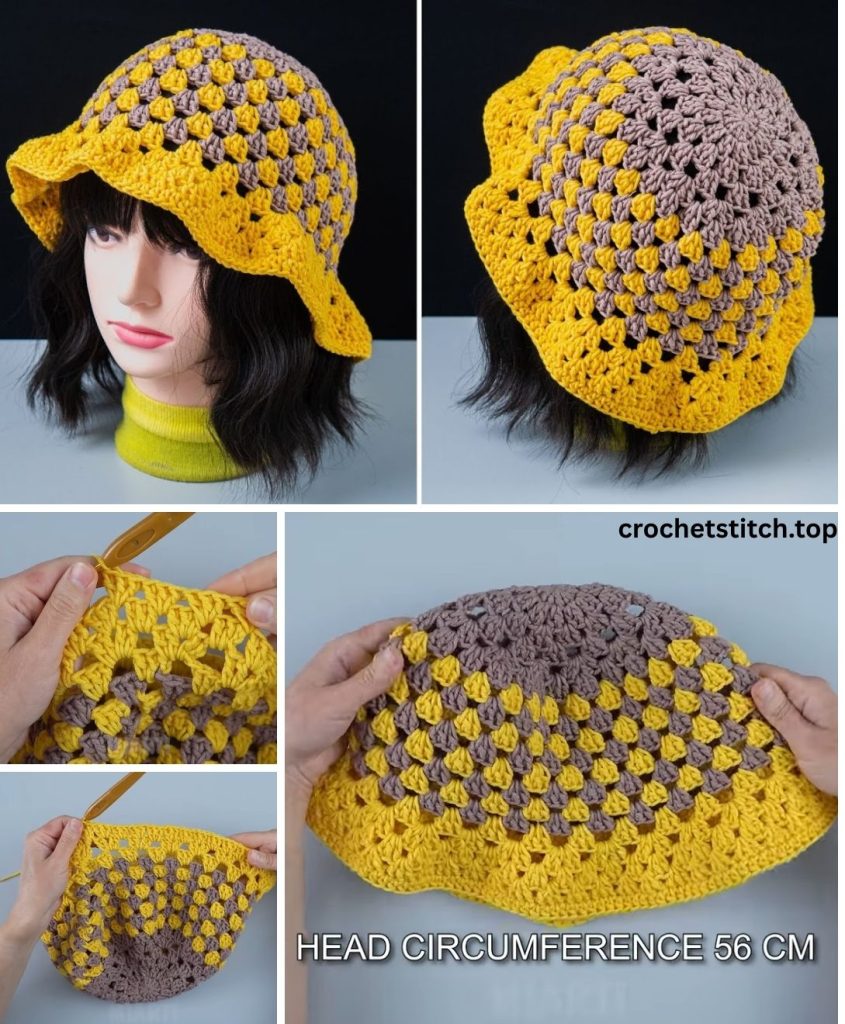
The number of squares you need depends on the size of your head and the size of your squares. For a standard adult-sized hat, you will need 6 squares: 4 for the sides and 2 for the top (or a large single square for the top).
Basic Granny Square Pattern:
- Foundation: Start with a magic ring or by chaining 4 and slip stitching to the first chain to form a ring.
- Round 1: Ch 3 (counts as a dc), 2 dc into the ring.
(Ch 2, 3 dc into the ring)Repeat from()two more times. Ch 2, sl st to the top of the initial Ch 3 to join. (You will have four 3-dc clusters separated by four ch-2 spaces). - Round 2: Sl st into the next two dc and then into the ch-2 space. Ch 3 (counts as a dc),
(2 dc, ch 2, 3 dc)into the same ch-2 space.(Ch 1, 3 dc into the next ch-2 space, ch 1, 3 dc, ch 2, 3 dc) into the next ch-2 space. Repeat from()two more times. Ch 1, 3 dc into the next ch-2 space, ch 1, sl st to the top of the initial Ch 3 to join. - Round 3: Sl st into the next two dc and into the corner ch-2 space. Ch 3,
(2 dc, ch 2, 3 dc)into the same corner space.(Ch 1, 3 dc into the next ch-1 space)Repeat this across the side, ending with a ch 1 before the next corner.(3 dc, ch 2, 3 dc) into the next corner space. Repeat the pattern around. Sl st to the top of the initial Ch 3 to join.
Continue adding rounds until your squares are the size you need. For an adult hat, a square with a side length of approximately 5-6 inches is a good starting point. Make all 6 squares the same size.
Tip for a Clean Look: Weave in your ends as you go! It makes assembly much easier.
Part 2: Assembling the Hat
Once all your squares are complete, you will seam them together to form the hat.
Layout:
- Side Panel: Lay out four squares in a row. These will form the sides of the hat.
- Top Panel: One square will be the top of the hat.
- The Crown: The last square will be the very top.
Seaming Techniques: You have a few options for joining your squares.
- Slip Stitch Join: With the wrong sides facing each other, insert your hook through the back loop of one square and the front loop of the corresponding stitch on the other square. Slip stitch all the way across.
- Whipstitch: Use a yarn needle to sew the squares together. This creates a flat, almost invisible seam.
- Single Crochet Join: This creates a more visible, raised seam.
Assembly Steps:
- Form the Sides: Take your four squares for the sides and seam them together along one edge to create a long strip.
- Create the Cylinder: Seam the first square of the strip to the last square to form a cylinder.
- Attach the Top: Seam one of the remaining squares to the top of the cylinder. It will be a bit of a tight fit, so you may need to stretch it slightly to make sure it’s centered and the stitches line up correctly. Seam along all four sides of the square.
- Attach the Crown: Seam the last square to the very top of the hat. This will be the center, and you’ll want to make sure it’s securely attached.
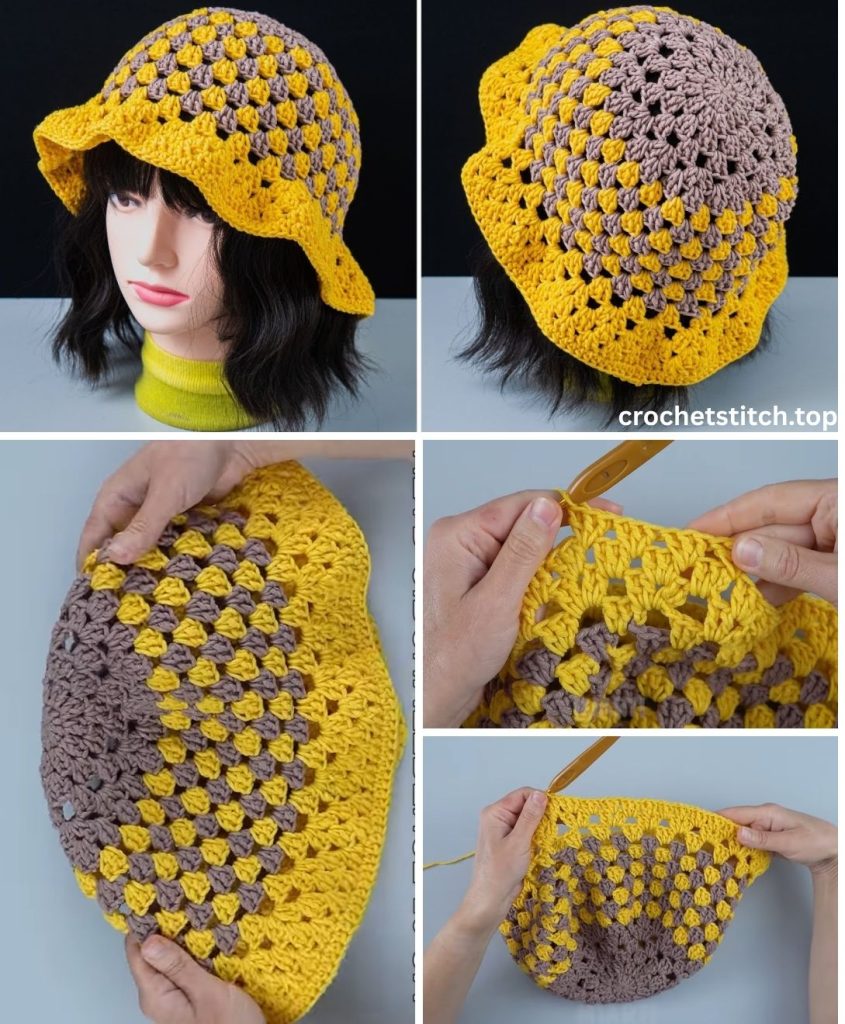
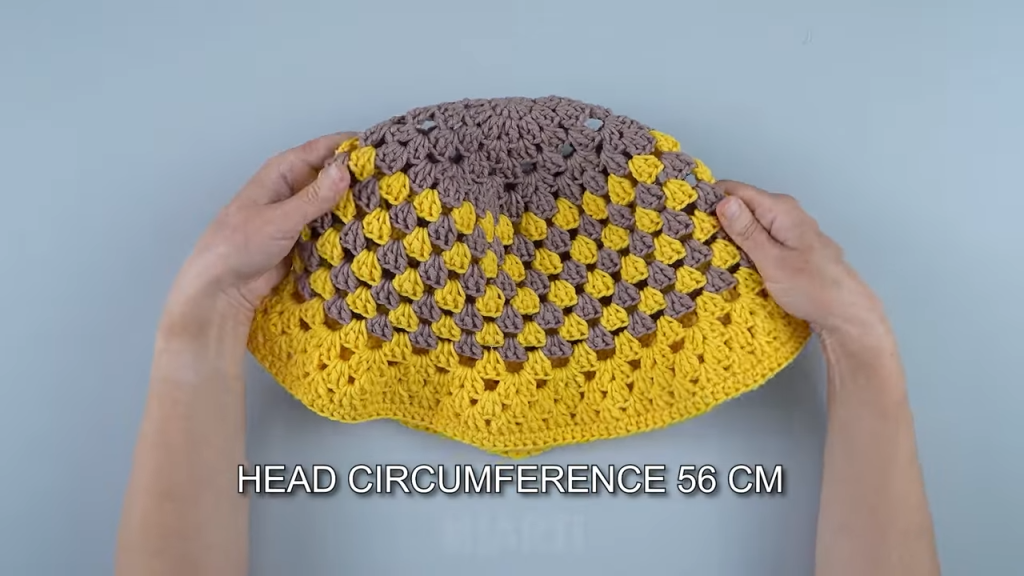
Part 3: The Brim
The brim is what gives the bucket hat its classic shape. We will now work in the round to create it.
- Join Yarn: Join your yarn to the bottom edge of the hat where the side panels meet the open edge.
- Round 1 (Brim Base): Sc in each stitch around the entire bottom circumference of the hat. Join with a sl st to the first sc.
- Increasing Rounds: We will now increase to make the brim flare out.
- Round 2: Ch 1.
*sc in the next 2 stitches, 2 sc in the next stitch.*Repeat from()around. Join with a sl st. - Round 3: Ch 1.
*sc in the next 3 stitches, 2 sc in the next stitch.*Repeat from()around. Join with a sl st. - Round 4: Ch 1.
*sc in the next 4 stitches, 2 sc in the next stitch.*Repeat from()around. Join with a sl st.
- Round 2: Ch 1.
Continue adding rounds and increasing to your desired brim width. A brim that is 2-4 inches wide is a good standard for a bucket hat.
Part 4: Finishing the Hat
Once the brim is the desired width, it’s time to finish off your hat with a neat edge.
- Final Round: For a clean finish, work a round of slip stitches all the way around the edge of the brim. This will create a firm, clean edge.
- Fasten Off: After completing the final round, cut your yarn, leaving a 6-inch tail. Pull the tail through the last loop on your hook to secure the stitch.
- Weave in All Ends: Take your yarn needle and weave in all remaining loose ends.
- Blocking (Optional): For a professional finish, you can gently block your hat. Simply mist the hat with water, shape it, and let it air dry completely.
Congratulations! You have successfully created a unique and stylish granny square bucket hat. Enjoy wearing your new handmade accessory!