 by
by Here is a detailed, guide on how to crochet a beautiful three-color flower coaster. This pattern is designed to be beginner-friendly while producing a stunning and professional-looking result.
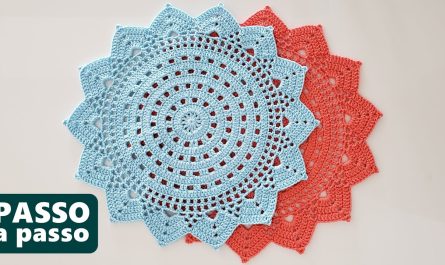
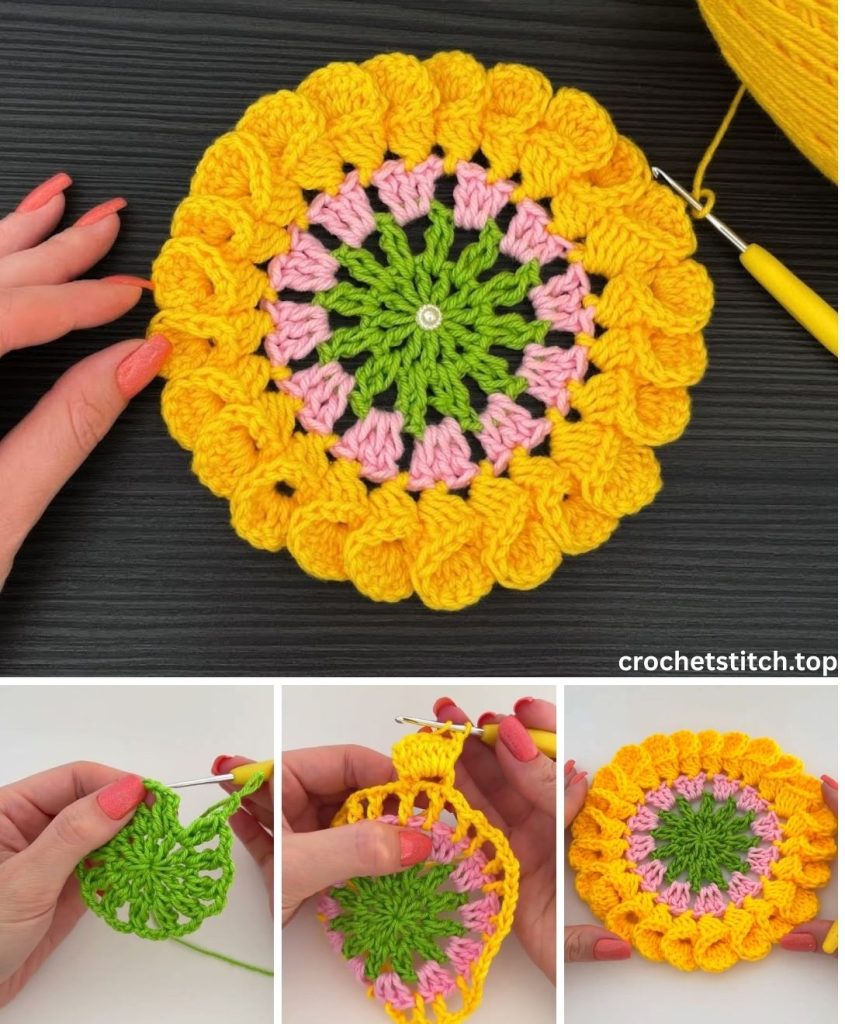
Create a Garden on Your Table: A Detailed Guide to Crocheting a Three-Color Flower Coaster
There’s a special kind of joy in creating something both beautiful and functional with your own hands. A handmade coaster not only protects your furniture but also adds a pop of color and personality to your living space. This step-by-step pattern will guide you through creating a charming three-color flower coaster.
This project is perfect for using up scrap yarn and makes for a wonderful, thoughtful gift for housewarmings, birthdays, or just because. We will break down every round in detail, explaining not just the what but also the why, so you can build your crochet skills and confidence.
Let’s gather our materials and begin this creative journey!
Part 1: Preparation is Key
Before you make your first stitch, it’s essential to have everything you need ready.
Materials & Tools
- Yarn: For coasters, 100% cotton yarn is highly recommended. It’s absorbent, durable, and heat-resistant. Choose a DK (Double Knitting) or Worsted Weight yarn. For this pattern, you will need three different colors:
- Color A: For the center of the flower (e.g., Yellow or Brown).
- Color B: For the inner petals (e.g., White or Light Pink).
- Color C: For the outer petals and border (e.g., Blue, Pink, or Purple).
- Crochet Hook: The hook size will depend on your yarn weight. A size
4.0mm (G-6)or5.0mm (H-8)hook is typically suitable for DK or worsted weight yarn. Check your yarn label for the recommended hook size. - Scissors: A small, sharp pair for trimming yarn.
- Darning/Tapestry Needle: This is crucial for weaving in the ends neatly to give your coaster a clean, professional finish.
Crochet Abbreviations & Stitches (US Terminology)
This pattern uses standard US crochet terminology. If you are new to these stitches, practice them a few times before you begin.
- MR: Magic Ring (also known as a magic circle or adjustable loop). This creates a tight, seamless center.
- ch: Chain
- sl st: Slip Stitch
- sc: Single Crochet
- hdc: Half Double Crochet
- dc: Double Crochet
- tr: Treble (or Triple) Crochet
- st(s): Stitch(es)
- sp: Space
- […]: Brackets indicate a set of stitches to be repeated.
- (…): Parentheses indicate stitches worked into the same stitch or space.
Pattern Notes
- Working in the Round: This coaster is worked in continuous rounds, starting from the center and working outwards.
- Joining Rounds: Each round will be joined with a slip stitch to the first stitch of that round.
- Color Changes: We will fasten off the yarn at the end of each color section and join the new color as instructed.
- Tension: Try to keep your tension consistent. If your coaster starts to curl up, you may be crocheting too tightly. If it becomes wavy, you may be too loose. For a coaster, a slightly tighter tension is generally better.
Part 2: The Step-by-Step Crochet Pattern
Let’s begin crocheting our flower coaster!
Round 1: The Flower Center (Color A)
This round forms the very center of your flower.
- Start with Color A by making a Magic Ring (MR).
- ch 3. This initial chain-3 acts as your very first double crochet (dc) stitch.
- Work 11 dc stitches into the magic ring.
- You should now have a total of 12 stitches in the ring (the initial ch-3 plus the 11 dc).
- Pull the tail of the magic ring gently but firmly to close the center hole completely.
- To finish the round, sl st into the top of the beginning ch-3.
- Cut your yarn, leaving a 6-inch tail. Fasten off by pulling the tail through the loop on your hook.
- End of Round 1: You will have a small, flat circle with 12 dc stitches.
Round 2: Building the Base for Petals (Color B)
In this round, we switch to our second color and create a foundation from which our first set of petals will emerge.
- Take Color B and make a slip knot on your hook.
- Join the new color by inserting your hook into any stitch from Round 1 and making a sl st.
- ch 3 (this counts as your first dc).
- Work 1 dc into the very same stitch you just joined into.
- Now, work 2 dc stitches into every single stitch around the circle.
- When you reach the end, you will have doubled your stitch count.
- sl st to the top of the beginning ch-3 to join the round.
- End of Round 2: You will have a larger circle with 24 dc stitches. Do not fasten off Color B.
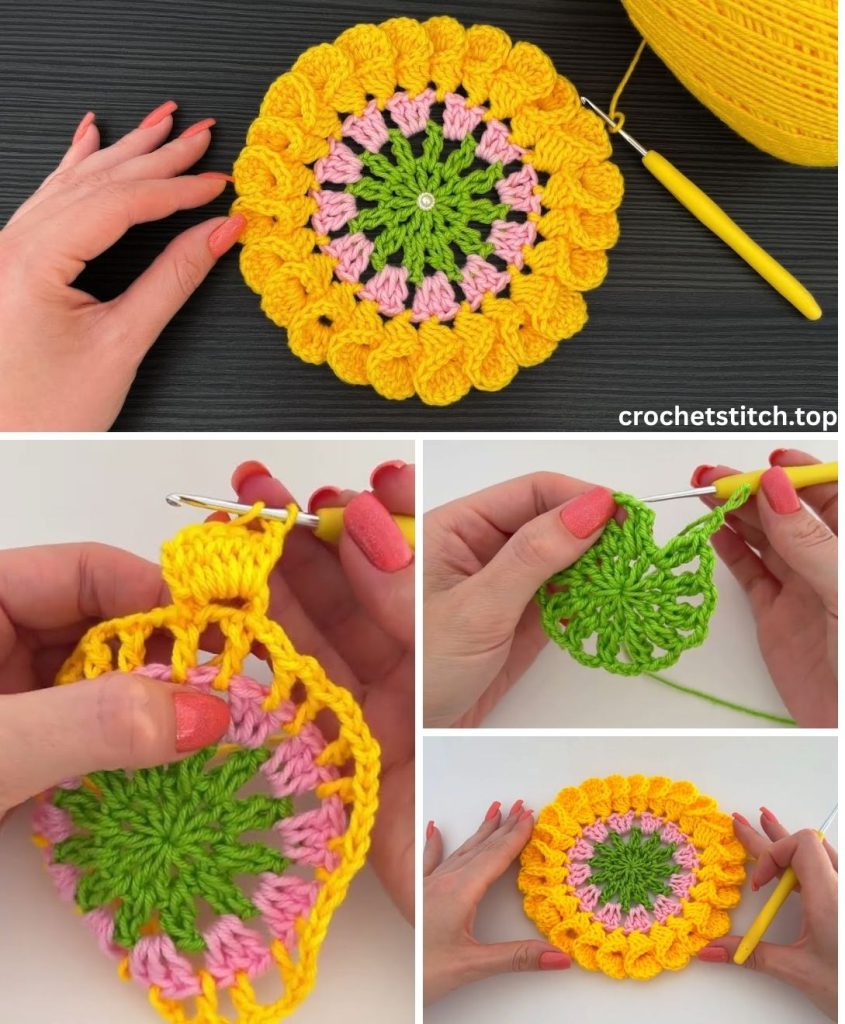
Round 3: The First Layer of Petals (Color B)
This is where the magic begins, and your work starts to look like a flower! We will be creating small, defined “shell” stitches to form the inner petals.
- Continuing with Color B, ch 1 (this does not count as a stitch).
- Work 1 sc into the same stitch.
- Skip the next stitch.
- In the next stitch, work a shell of 5 tr stitches. (A treble crochet is taller than a double crochet, which will make the petals “pop”).
- Skip the next stitch.
- 1 sc in the next stitch.
- This completes one petal sequence. Repeat this sequence
[Skip 1 st, 5 tr in next st, Skip 1 st, 1 sc in next st]all the way around. - You will end the round with a shell of 5 tr stitches. To join, sl st into the very first sc you made in this round.
- Now you can cut Color B, leaving a 6-inch tail, and fasten off.
- End of Round 3: You will have 6 distinct petals made with Color B, forming the inner layer of your flower.
Round 4: Creating the Foundation for the Outer Petals (Color C)
For this round, we will work behind the petals we just made, creating a series of chain spaces that will serve as the anchor for our final, larger petals. This technique gives the flower a beautiful, three-dimensional look.
- Take Color C and make a slip knot on your hook.
- Turn your work over so you are looking at the back. You will be working into the unworked (skipped) stitches from Round 2.
- Find a sc stitch from Round 3. Locate the skipped dc stitch from Round 2 that is just behind and to the right of that sc. Insert your hook from back to front into that skipped stitch and make a sc to join your yarn.
- ch 4.
- Find the next skipped stitch from Round 2 (it will be behind the next sc from Round 3) and work 1 sc into it.
- Repeat the sequence
[ch 4, sc in the next available skipped stitch from Round 2]all the way around. - After your last
ch 4, sl st into the first sc you made in this round to join.
- End of Round 4: When you turn your work to the front, you should see the petals from Round 3 sitting on top, with 6
ch-4loops from Color C peeking out from behind them.
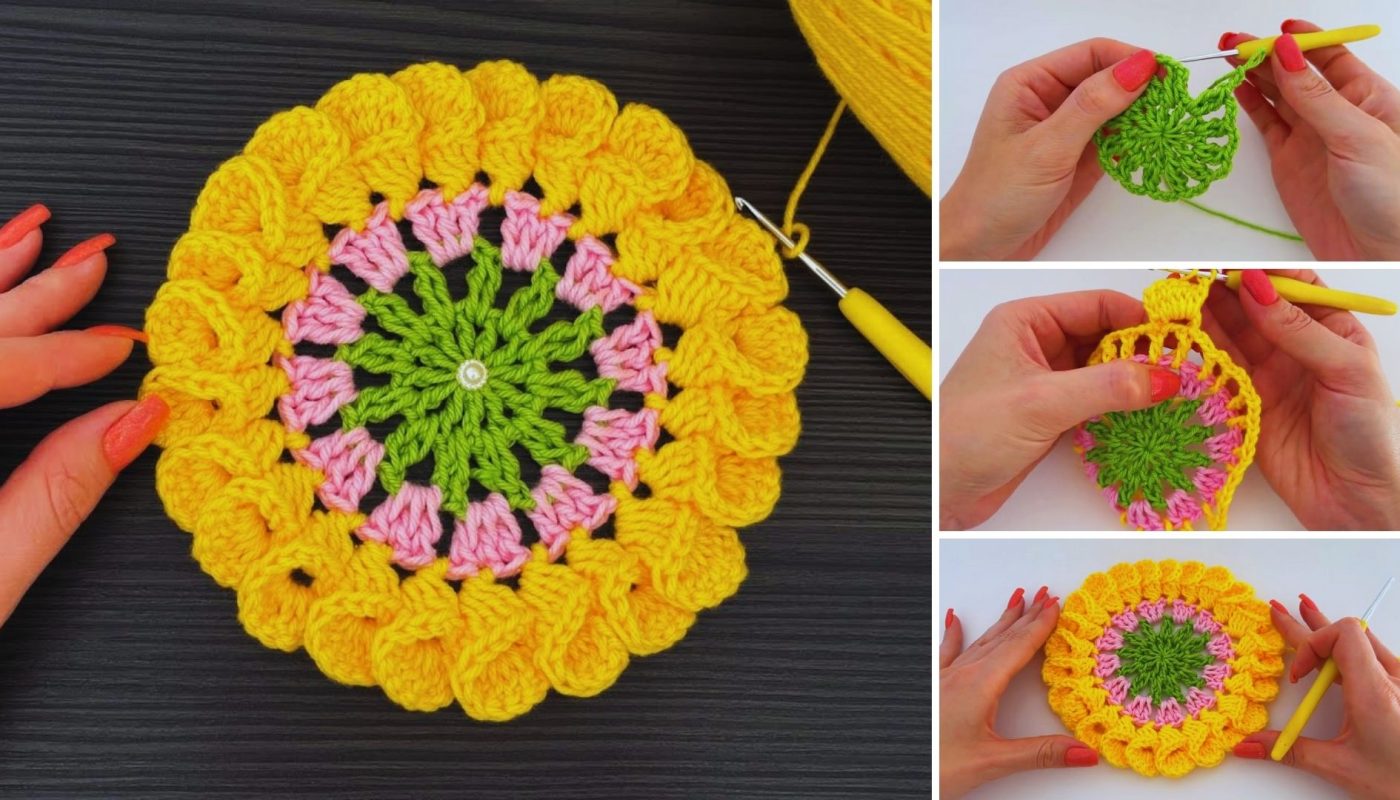
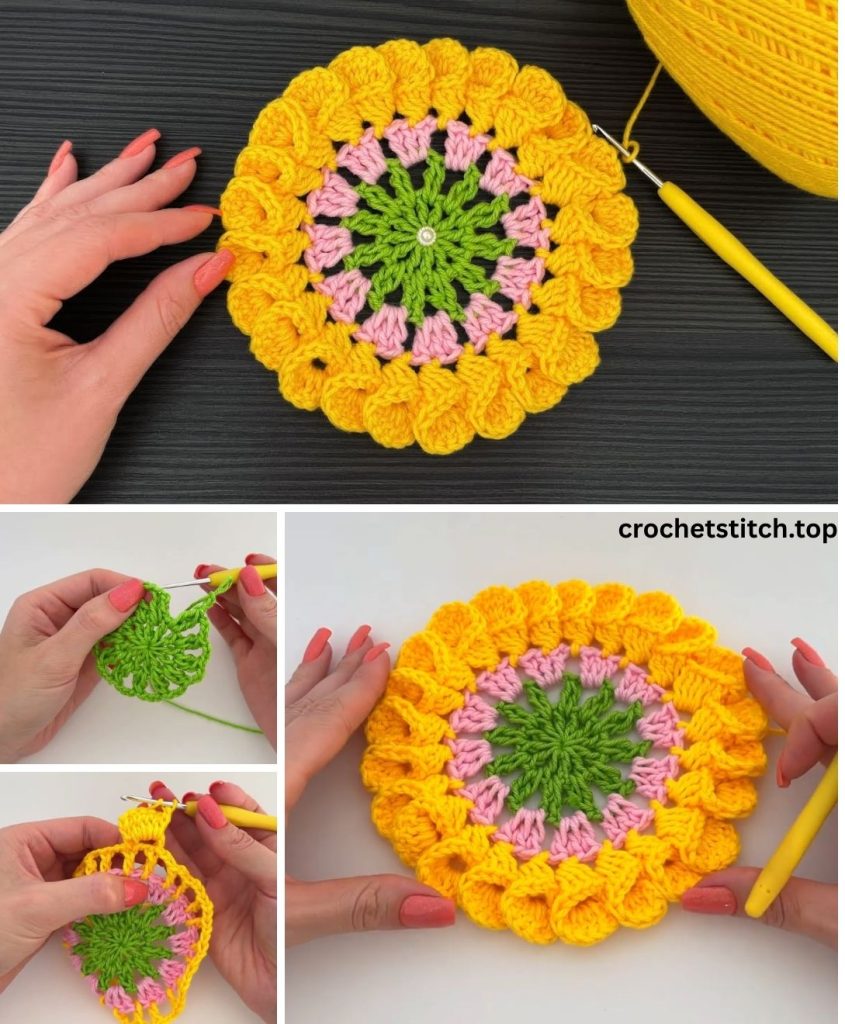
Round 5: The Final Outer Petals (Color C)
This final round completes our flower, creating large, lush petals that form the functional coaster shape.
- Continuing with Color C, sl st into the first
ch-4space. - Work the following sequence of stitches directly into that same
ch-4space:(1 sc, 1 hdc, 1 dc, 3 tr, 1 dc, 1 hdc, 1 sc). This creates one large, rounded outer petal. - Move directly to the next
ch-4space and repeat the petal sequence:(1 sc, 1 hdc, 1 dc, 3 tr, 1 dc, 1 hdc, 1 sc). - Continue this pattern in each of the 6
ch-4spaces around. - After completing your final petal, sl st into the very first sc of the round to join.
- Cut your yarn, leaving a final 6-inch tail, and fasten off.
- End of Round 5: Your beautiful three-color flower coaster is now structurally complete!
Part 3: Finishing Touches
The final steps are what separate a good project from a great one. Don’t skip them!
Weaving in the Ends
This is the most critical step for durability and a clean look.
- Thread one of the yarn tails onto your darning needle.
- Turn the coaster to the back side.
- Weave the needle under several stitches in one direction, then change direction and go back under a few different stitches. This locks the yarn in place so it won’t unravel during use or washing.
- Avoid weaving into the very edge of the stitches, as it can be visible from the front. Try to work within the body of the stitches.
- Once the tail is secure, snip the excess yarn close to the coaster.
- Repeat this for all remaining yarn tails.
Blocking (Optional but Recommended)
Blocking is the process of wetting or steaming your crochet to shape it. For a coaster, it helps the petals lie perfectly flat.
- Wet Blocking: Submerge your coaster in cool water for a few minutes. Gently squeeze out the excess water (do not wring it). Lay it flat on a towel or foam mat, shape it perfectly with your fingers, and pin the petal tips if needed. Let it air dry completely.
- Steam Blocking: Pin your dry coaster to a foam mat or ironing board. Hold a steam iron or a garment steamer a few inches above the coaster (never let the hot iron touch the yarn directly). Steam it lightly until it’s slightly damp, then let it cool and dry completely.
Variations and Customization
Now that you’ve mastered the pattern, let your creativity bloom!
- Color Palettes:
- Sunflower: Color A (Brown), Color B (Yellow), Color C (Dark Yellow or Gold).
- Daisy: Color A (Yellow), Color B (White), Color C (Green).
- Rose: Color A (Yellow), Color B (Light Pink), Color C (Dark Pink).
- Monochromatic: Use three different shades of the same color (e.g., light blue, medium blue, dark blue).
- Make a Set: Create a set of four or six coasters. You can make them all identical or use a different Color C for each one to create a coordinated, colorful set.
- Wall Art: Instead of using them as coasters, string several flowers together to make a beautiful garland or wall hanging.
You have successfully created a gorgeous and practical piece of fiber art. Whether it’s for your morning coffee or a gift for a loved one, this three-color flower coaster is sure to bring a smile.
Happy Crocheting!