by
by Absolutely! Here’s a comprehensive, detailed guide on how to crochet a two-color tea cup coaster — a perfect project for cozying up your tea time or gifting to tea lovers. This long article will walk you through every step, from materials to finishing touches, with clear instructions for crocheting a cute, functional, and sturdy coaster shaped like a tea cup using two colors.
A Cup of Coziness: A Detailed Guide to Crocheting a Two-Color Teacup Coaster
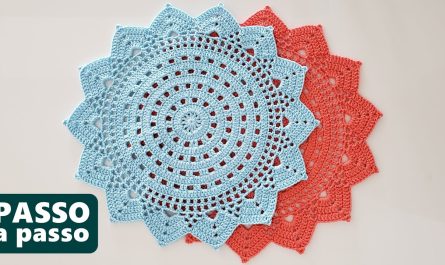
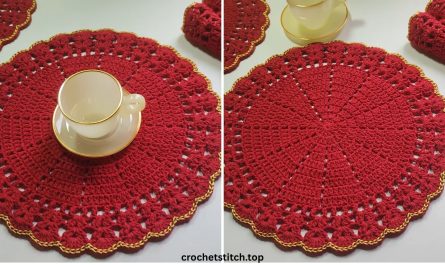
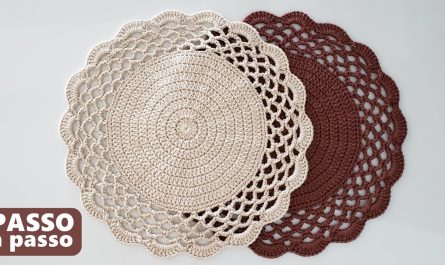
Transform your coffee table into a scene of charming comfort with these adorable crocheted teacup coasters. This isn’t just a simple circle; it’s a delightful little piece of art complete with a contrasting rim and a dainty handle. It’s the perfect project for a quiet afternoon and makes an absolutely wonderful handmade gift for the tea or coffee lover in your life.
This detailed, step-by-step guide is designed to be easy to follow, even if you are relatively new to crochet. We will walk through creating the coaster base, adding a decorative edge in a second color, and finally, crafting the signature teacup handle.
So, put the kettle on, pick your favorite yarn colors, and let’s get started!
Part 1: Gathering Your Supplies
A well-prepared crafter is a happy crafter. Let’s make sure you have everything you need before we begin.
Materials & Tools
- Yarn: For a coaster that needs to be absorbent and durable, 100% cotton yarn is the best choice. It holds its shape well and can withstand heat from a warm mug. You will need a Worsted Weight (Aran) yarn in two colors:
- Main Color (MC): This will be for the body of the teacup. (e.g., White, Cream, Light Blue)
- Contrast Color (CC): This will be for the decorative rim and the handle. (e.g., Navy Blue, Pink, Gold)
- Crochet Hook: A
5.0mm (H-8)crochet hook is a great size for worsted weight cotton yarn, as it creates a dense but not overly stiff fabric. - Scissors: For cutting your yarn.
- Darning Needle (or Tapestry Needle): This is absolutely essential for weaving in your yarn ends for a secure and tidy finish.
Crochet Abbreviations & Stitches (US Terminology)
This pattern uses standard US crochet terms. Here’s a quick reference for the stitches we’ll be using:
- MC: Main Color
- CC: Contrast Color
- MR: Magic Ring (or Magic Circle)
- ch: Chain
- sl st: Slip Stitch
- sc: Single Crochet
- hdc: Half Double Crochet
- dc: Double Crochet
- st(s): Stitch(es)
- […]: Brackets indicate a set of stitches to be repeated.
Pattern Notes
- Construction: The coaster is worked in the round to create a flat circle for the cup’s body. The handle is then attached and worked separately.
- Joining Rounds: Each round of the circle is joined with a slip stitch to the first stitch of that round.
- The ‘ch 3’: At the beginning of each round worked in double crochet, the starting
ch 3counts as the firstdcstitch of that round. - Gauge: While exact gauge isn’t critical for a coaster, consistent tension is key to ensuring it lays flat. A finished coaster base should measure approximately 4 inches (10 cm) in diameter before adding the border.
Part 2: The Step-by-Step Crochet Pattern
Let’s begin bringing our teacup to life!
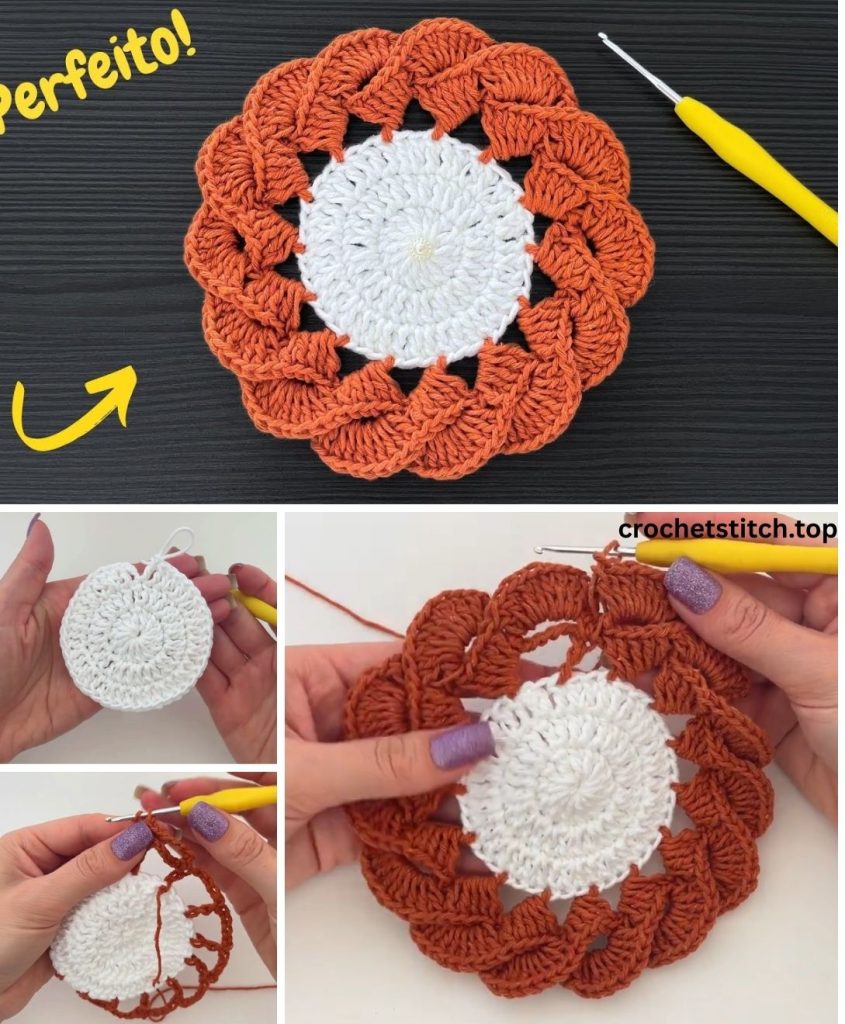
Part A: The Coaster Base (Main Color – MC)
This section forms the main body of the coaster, which looks like a saucer or the top-down view of a cup.
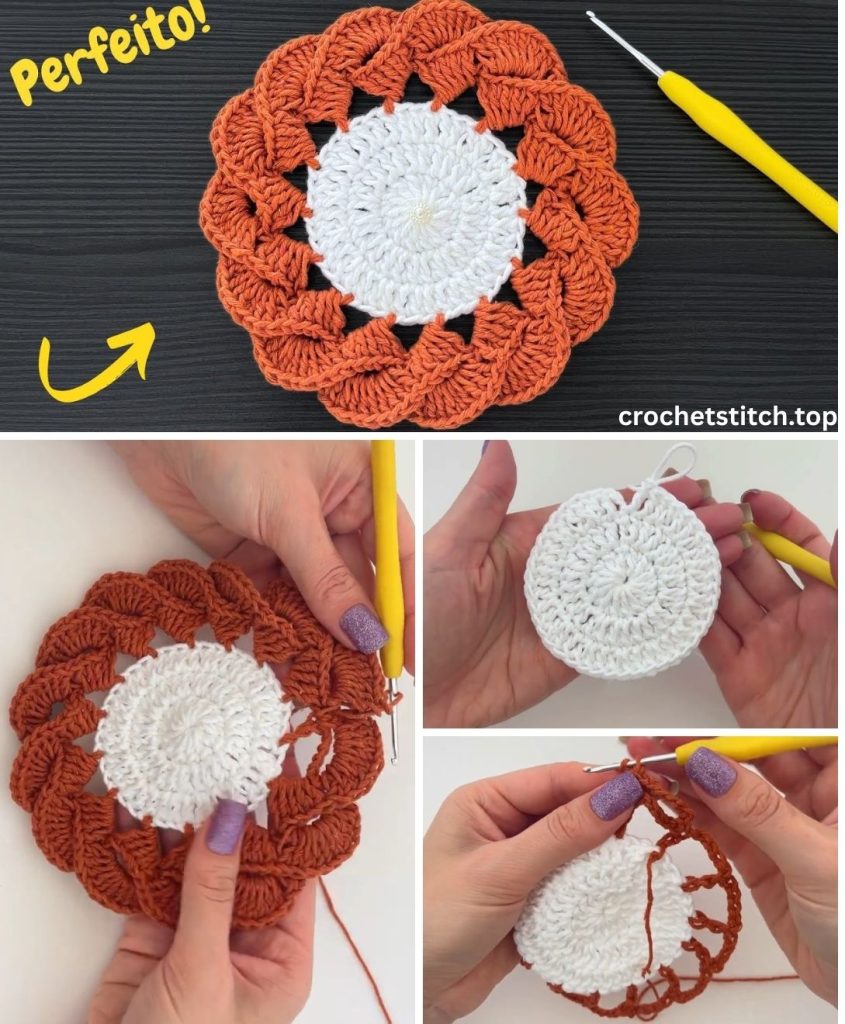
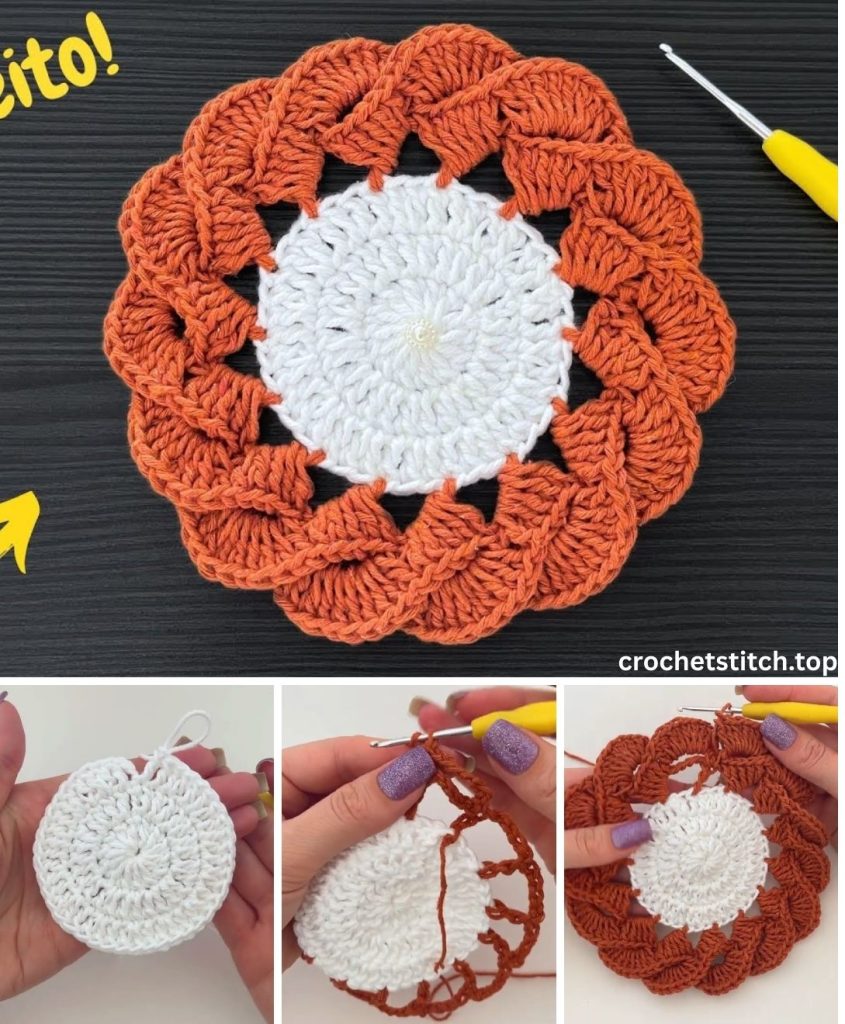
Round 1: Using your MC, start with a Magic Ring (MR). ch 3 (counts as your first dc). Work 11 dc into the ring. Pull the tail to close the ring tightly. Join with a sl st to the top of the beginning ch-3. Stitch Count: 12 dc
Round 2: ch 3. Work 1 dc into the same stitch as the join. Work 2 dc in every stitch around. Join with a sl st to the top of the beginning ch-3. Stitch Count: 24 dc
Round 3: ch 3. Work 2 dc in the next stitch. [1 dc in the next stitch, 2 dc in the stitch after that]. Repeat the bracketed sequence [...] all the way around. Join with a sl st to the top of the beginning ch-3. Stitch Count: 36 dc
Round 4: ch 3. Work 1 dc in the next stitch. Work 2 dc in the stitch after that. [1 dc in each of the next 2 stitches, 2 dc in the stitch after that]. Repeat the bracketed sequence [...] all the way around. Join with a sl st to the top of the beginning ch-3. Stitch Count: 48 dc
Your flat circle is now complete. Cut your MC yarn, leaving a 6-inch tail. Fasten off by pulling the tail through the loop on your hook.
Part B: The Decorative Edge (Contrast Color – CC)
Now we will add a beautiful, scalloped “rim” to our saucer.
Round 5: Take your CC yarn and make a slip knot on your hook. Join with a sl st into any stitch along the edge of your circle. ch 1 (does not count as a stitch). Work 1 sc in that same stitch. Skip the next stitch. In the following stitch, work a shell of 5 dc. Skip the next stitch. Work 1 sc in the following stitch. You have just completed one scallop. Repeat the sequence [Skip 1 st, 5 dc in next st, Skip 1 st, 1 sc in next st] all the way around. You should end the round with a final shell of 5 dc. To join, sl st into the very first sc you made in this round. Stitch Count: 12 scallops
Do not fasten off your yarn! We will flow directly from this point into making the handle.
Part C: The Teacup Handle (Contrast Color – CC)
This is the final touch that transforms our circle into a teacup!
- Create the Loop: From where you just joined Round 5, ch 12. This chain will form the curved shape of the handle. Be careful not to twist it.
- Anchor the Handle: Skip approximately 4 stitches clockwise along the edge of your coaster (this is roughly the width of one scallop). Insert your hook into the next sc stitch between scallops and secure the chain with a sl st. You now have a chain loop attached to the side of your coaster.
- Thicken the Handle: Now, we will work back along the chain to give it substance. Turn your work slightly. Work 14 sc stitches around the
ch-12space. (Working around the chain is easier than working into each chain link and gives a fuller look). - Finish the Handle: Once you have worked all 14 sc stitches around the chain, sl st into the base of the coaster right where the handle began. This secures the handle completely.
Now, cut your CC yarn, leaving a long 8-inch tail for secure weaving. Fasten off.
Part 3: The Finishing Touches
Your coaster is crocheted, but these final steps will make it perfect.
Weaving in Ends
This is a crucial step for a durable and professional finish.
- Thread a yarn tail onto your darning needle.
- Turn the coaster to the back.
- Carefully weave the needle under several stitches on the back side. Go in one direction, then double back in a slightly different path to lock the yarn in place.
- Pay special attention to the tails from the handle. Weave them securely into the base of the handle and the body of the coaster to ensure the handle is strong.
- Once each end is secure, snip the remaining yarn close to the surface.
Blocking
Blocking will help your coaster lie perfectly flat and set the shape of the handle.
- Lightly mist your coaster with water using a spray bottle, or dip it in cool water and gently squeeze out the excess.
- Lay the damp coaster on a flat surface like a foam mat or a clean, dry towel.
- Use your fingers to smooth out the circle and shape the scallops. Gently pull the handle into a pleasing “C” shape.
- You can use pins to hold the shape if you wish.
- Let it air dry completely.
Customization and Creative Ideas
- Color Palettes: Think of classic china patterns (blue and white), modern kitchen colors (grey and yellow), or festive themes (red and green).
- Embellishments: For an extra touch of cuteness, use embroidery floss to stitch a tiny flower onto the coaster base, or sew on a small decorative button.
- Tea Bag Tag: For ultimate charm, crochet a tiny square (
ch 4, 3 rows of 3 sc), attach a length of yarn, and tack it to the coaster’s rim so it looks like a little tea bag tag is hanging out. - Make a Set: A set of four or six of these coasters tied together with a ribbon makes an unforgettable handmade gift.
You’ve now created a functional and utterly charming piece of home decor. Your new teacup coaster is ready to serve its purpose, bringing a little bit of handmade joy to your daily routine.
Enjoy your cozy creation!