 by
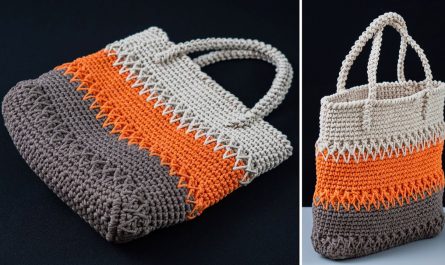
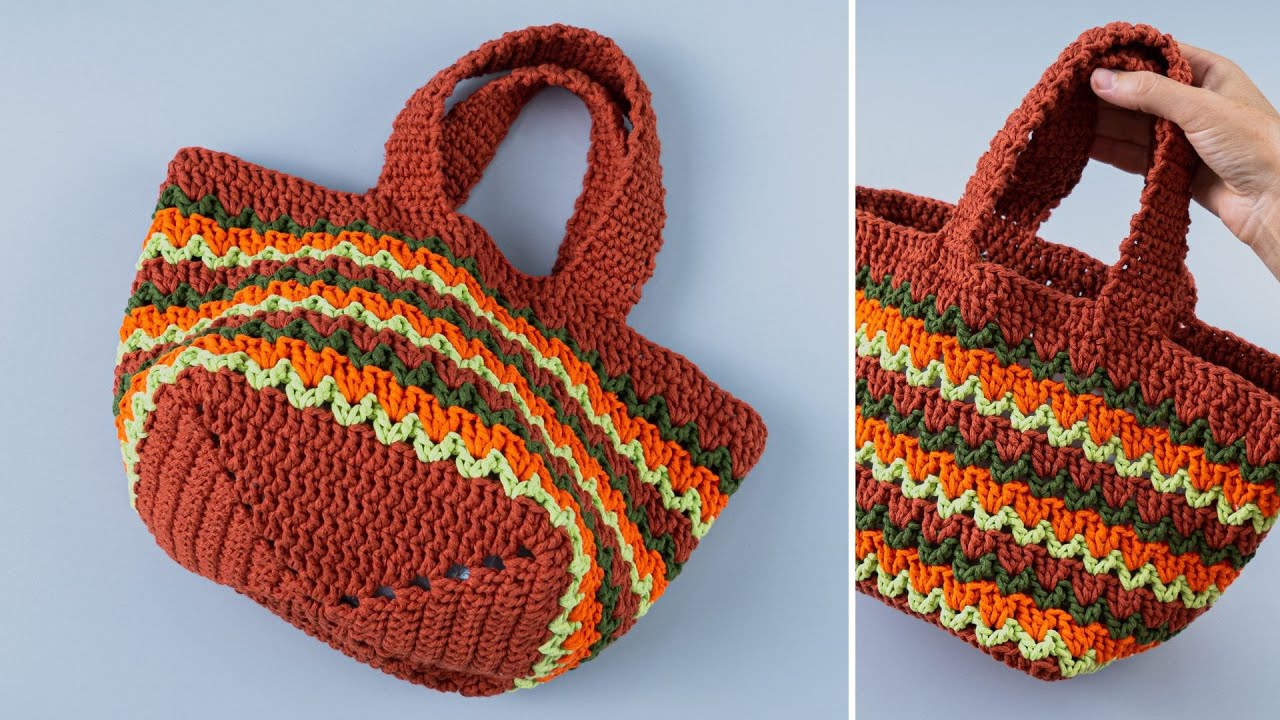
by A crochet tote bag is a versatile and stylish accessory that is perfect for carrying your daily essentials, books, or groceries. This detailed, step-by-step tutorial will guide you through creating a simple yet durable striped tote bag. Using a simple stitch pattern and color changes, you can create a unique and functional bag that is perfect for beginners and great for using up your yarn stash.
Materials You’ll Need
- Yarn: Approximately 200-300 grams of worsted weight (aran/10-ply) or bulky (12-ply) yarn in a few colors. Cotton, cotton blends, or a sturdy acrylic yarn are great choices as they create a strong fabric that holds its shape.
- Main Color (MC): The primary color for your bag.
- Accent Color(s) (AC): One or more colors for your stripes.
- Crochet Hook: A hook size appropriate for your chosen yarn. A 5.0mm (H/8) or 6.0mm (J/10) hook is recommended for creating a dense fabric.
- Scissors
- Yarn Needle (Tapestry Needle): Essential for weaving in ends and sewing on the handles.
- Stitch Marker: Very helpful for keeping track of the beginning of your rounds.
Key Crochet Stitches and Techniques
- Chain (ch): The foundation of most crochet projects.
- Slip Stitch (sl st): Used to join rounds and finish off.
- Single Crochet (sc): The main stitch for the bag body. It creates a tight and sturdy fabric.
- Crocheting in the Round: The entire bag is worked in a continuous spiral, which means you don’t join each round with a slip stitch. This creates a seamless fabric without a visible seam.
- Color Change: A simple technique for switching between your accent colors.
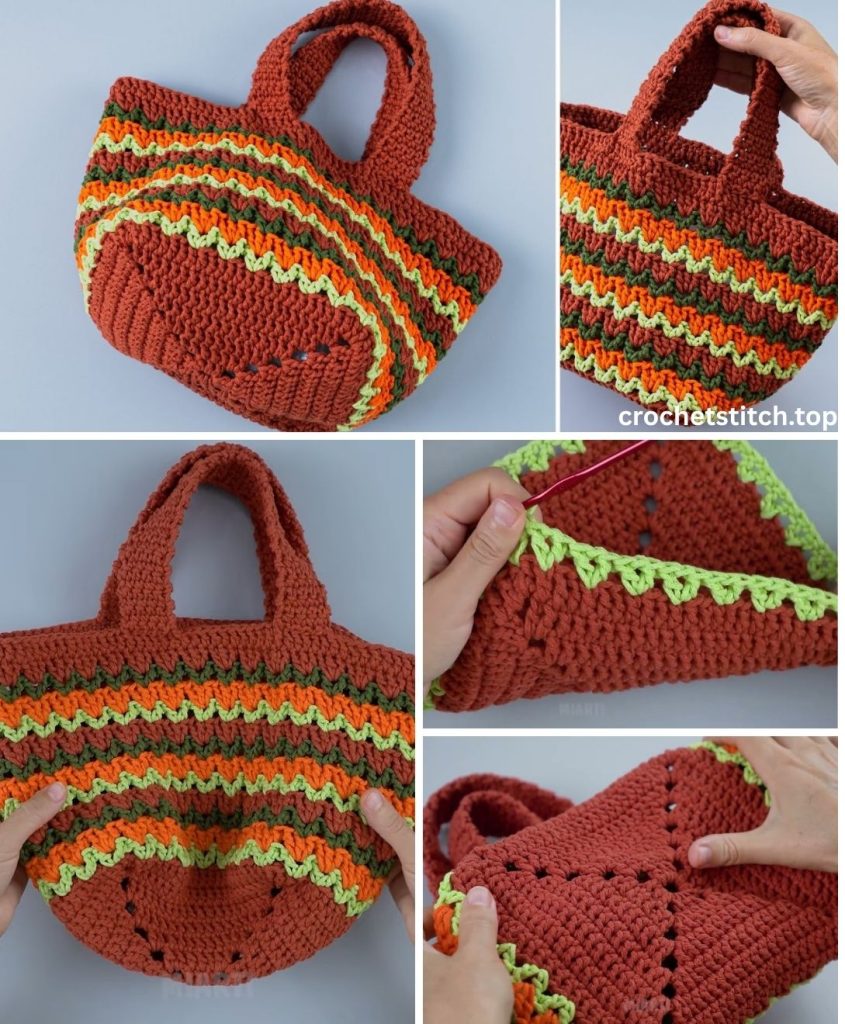
Part 1: Crocheting the Base of the Bag
A solid, rectangular base is crucial for a tote bag to prevent it from sagging and allow it to hold its shape when full. We will work this in your Main Color (MC).
- Foundation Chain: Chain 31 (or any odd number of chains to adjust the bag’s width).
- Round 1: Single crochet (sc) in the second chain from the hook and in each chain across until you reach the last one. Work 3 sc into the last chain. Now, pivot your work and continue crocheting down the other side of the foundation chain. Work 1 sc into each chain stitch across until you reach the very last one. You will have a total of 60 stitches (30 stitches on each side, with a 3-stitch turn at each end). Do not join the round. Place a stitch marker in the first stitch of the new round.
- Round 2: Work 1 sc in each sc around. When you reach the curve, you will have three stitches. Work 2 sc into the first stitch, 1 sc into the middle stitch, and 2 sc into the last stitch. This creates a smooth, rounded corner. Repeat this on the other side.
- Continuing the Base: Continue working in a spiral, placing 1 sc into each stitch on the straight sides and increasing in the stitches at the corners. For each new round, you will increase by 4 stitches (2 at each end of the bag). Stop increasing when your base is the desired size (for a medium tote, 4-5 rounds are usually sufficient). The total stitch count will increase with each round.
Part 2: Crocheting the Striped Body
Once the base is the desired size, you will stop increasing and work straight rounds to create the body of the bag. This is where you will introduce your stripes.
Tip for a Clean Color Change: To switch colors, work the last stitch of your round with the current color, but stop before the final yarn over. Yarn over with your new color and pull it through the last two loops on your hook. This creates a seamless transition. For this project, you can simply cut the yarn after each color change, leaving a 6-inch tail to weave in later.
- Start the Body: Remove your stitch marker and work 1 sc in each stitch around, without increasing. Place your stitch marker back in the first stitch of the round to keep track of your progress.
- Continue Working: Continue working in a continuous spiral of single crochet stitches, moving your stitch marker up at the end of each round.
- Building Height and Stripes: The number of rounds you work will determine the height of your bag. For a medium-sized tote, continue crocheting until the bag is approximately 12–14 inches tall. Change colors every 2-4 rounds to create your desired stripe pattern. For a simple pattern, you can alternate between your Main Color (MC) and your Accent Color (AC).
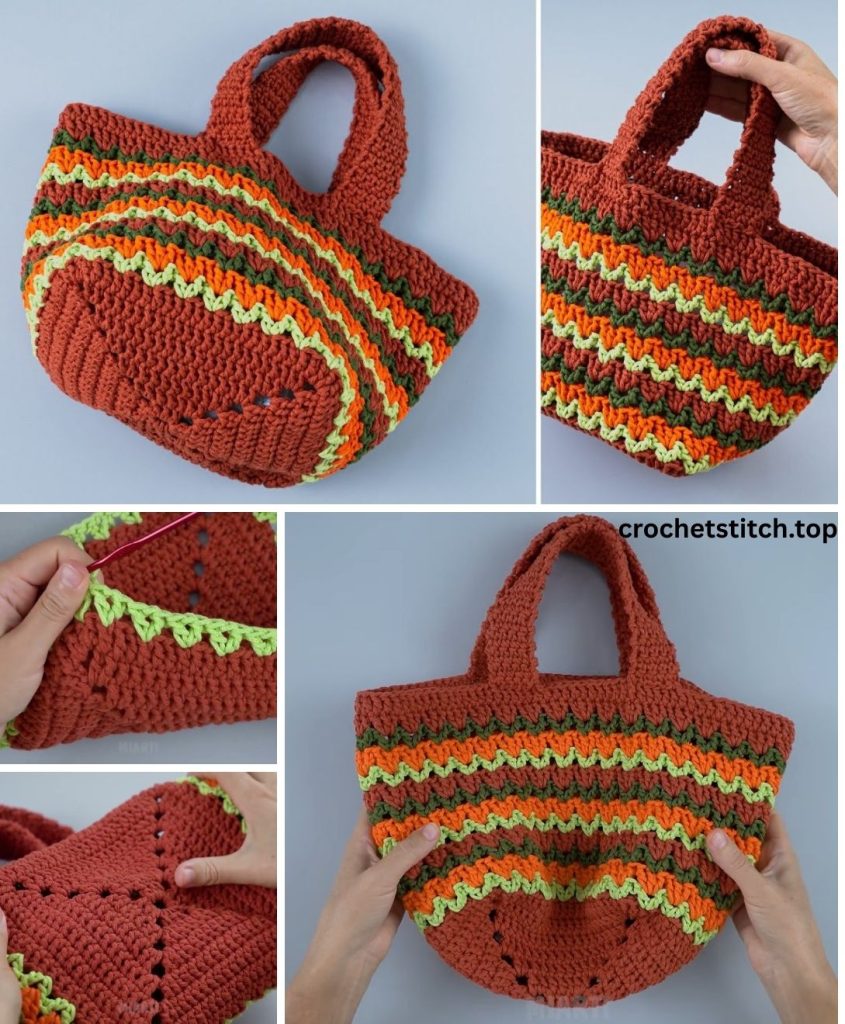
Part 3: The Shoulder Straps
A sturdy handle is crucial for a tote bag that can hold everything. We will create two simple, strong single crochet straps.
- Crocheting the Straps (Make 2): With your Main Color (MC) or an accent color, chain 6. Sc in the second chain from the hook and in each chain across (5 sc). Chain 1, turn. Sc in each stitch across. Chain 1, turn. Repeat this process until your strap is the desired length (24-30 inches is a good length for a shoulder bag). Fasten off, leaving a long tail for sewing.
- Attaching the Straps:
- Positioning: Lay your bag flat and find the two central points on the front and back where you want to attach your straps. Pin or mark these points with stitch markers.
- Sewing: Using a yarn needle and a long tail from your strap, securely sew the end of one strap to the inside of the bag. Use a strong whipstitch or a running stitch to ensure it is firmly attached and can handle weight.
- Reinforce: Go over the stitches a second time to reinforce the connection. A tote bag’s handles bear a lot of weight, so don’t skip this step!
- Repeat: Sew the other end of the strap to the back of the bag at the corresponding points. Repeat the process for the second strap.
Part 4: The Finishing Touches
- Weaving in All Ends: This is a crucial step for a professional finish. Use your yarn needle to carefully weave in all loose ends on the inside of the bag. Weave them through the stitches in different directions to ensure they are secure and hidden.
- Optional Lining: If you plan on carrying small items or heavy objects, adding a fabric lining is highly recommended. You can cut a piece of fabric to fit the inside of your tote bag, sew it into a bag shape, and hand-sew it to the top rim.
- Blocking (Recommended): Blocking your finished bag will help define the shape and stitches. Simply mist the bag with water, gently shape it, and let it air dry completely.
Congratulations! You have successfully created a beautiful and durable striped crochet tote bag. This project is a wonderful way to create a functional accessory that you can use and enjoy for years to come.