 by
by Here is a detailed, step-by-step guide on how to make a classic crochet square. This comprehensive article will cover everything from the necessary materials to detailed round-by-round instructions for two fundamental square patterns, plus tips and ideas for your finished creations.
A Detailed Guide to Crocheting the Perfect Square: From Classic Solid to Traditional Granny
The crochet square is one of the most fundamental and versatile motifs in the world of yarn crafts. Whether you’re a complete beginner taking your first steps or a seasoned crocheter looking for a meditative project, the humble square is a gateway to endless creativity. From cozy blankets and stylish bags to intricate garments and charming home decor, the possibilities are limitless.
This guide will walk you through the process of creating two essential types of crochet squares: the Classic Solid Square and the Traditional Granny Square. We’ll cover everything you need to know in detail, ensuring you have the skills and confidence to create beautiful, uniform squares every time.
Before You Begin: Gathering Your Tools and Knowledge
A little preparation goes a long way. Let’s get your toolkit ready and familiarize ourselves with the basics.
1. Materials Needed
- Yarn: For beginners, a smooth, light-colored worsted weight (Category 4) yarn is ideal. It’s easy to see your stitches and handle. Cotton or acrylic yarns are great choices.
- Crochet Hook: The yarn label will recommend a hook size. For worsted weight yarn, a 5.0 mm (H-8) or 5.5 mm (I-9) hook is a common starting point.
- Scissors: Any pair will do for snipping yarn.
- Yarn Needle (or Darning Needle): This is essential for weaving in your ends neatly, which gives your project a professional finish.
- Stitch Marker (Optional but Recommended): This little tool helps you keep track of the beginning of your rounds, preventing confusion.
2. Understanding Crochet Terminology (US Terms)
This pattern uses standard US crochet terminology. Here are the abbreviations we’ll be using:
- ch: chain
- st(s): stitch(es)
- sl st: slip stitch
- sc: single crochet
- hdc: half double crochet
- dc: double crochet
- sp: space
- beg: beginning
- […]: repeat instructions within brackets as directed
3. The Importance of Gauge
Gauge refers to the number of stitches and rows per inch in your crocheted fabric. While it’s less critical for a single square, if you plan to join many squares together for a project like a blanket, consistent gauge is key to ensuring they are all the same size. To check your gauge, you would make a small sample swatch (e.g., 4×4 inches) and measure your stitches against the pattern’s recommendation. For now, focus on keeping your tension consistent—not too tight, not too loose.
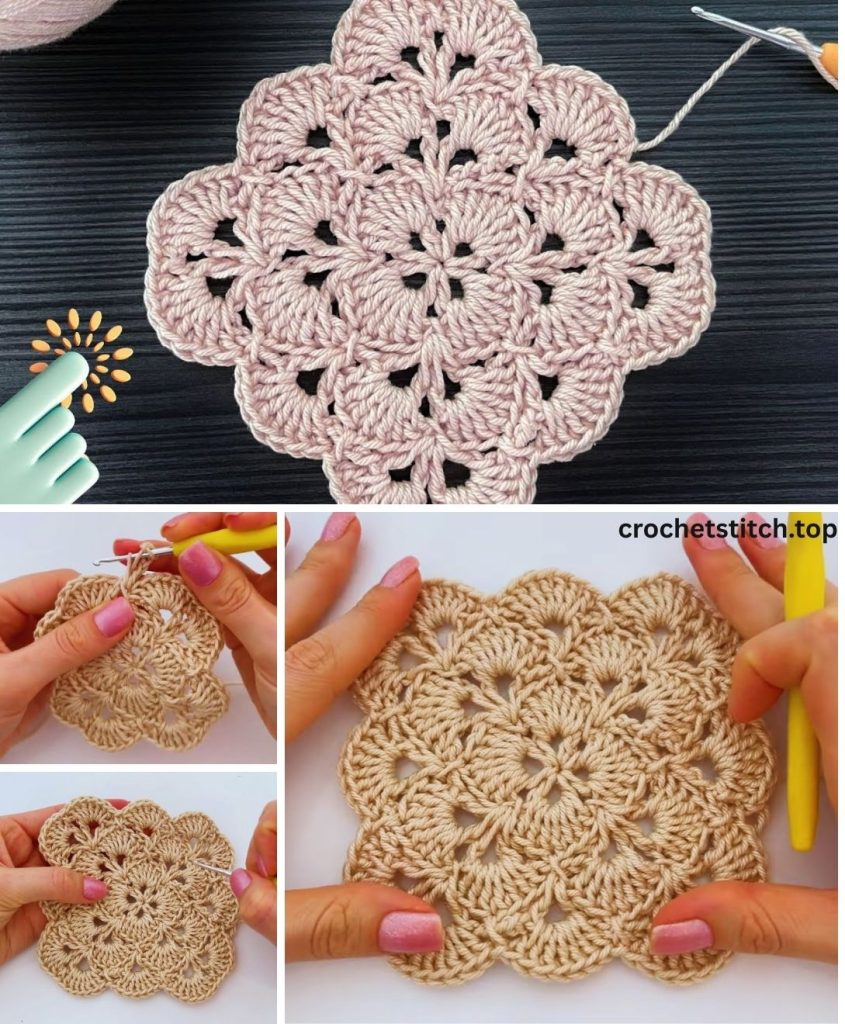
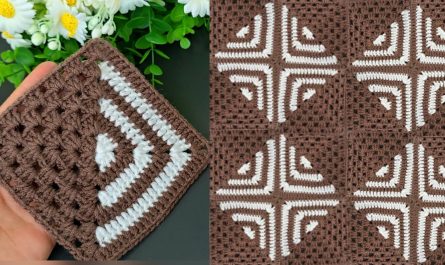
Pattern 1: The Classic Solid Granny Square
This square is worked from the center out in rounds. It creates a dense, solid fabric with no gaps, perfect for potholders, sturdy bags, and warm blankets.
Starting Your Square: The Magic Ring
The best way to start a project in the round is with a Magic Ring (also called a Magic Circle). This technique allows you to pull the center completely closed, leaving no hole.
- Drape the yarn over your fingers, with the tail end hanging down.
- Wrap the working yarn (the yarn from the ball) around your index and middle fingers to form an ‘X’.
- Turn your hand over. You will see two parallel strands.
- Insert your hook under the first strand and grab the second strand.
- Pull that strand under the first one and twist your hook up.
- Yarn over with your working yarn and pull through the loop on your hook. This creates your first chain and secures the ring. You can now carefully remove the ring from your fingers.
If you find the Magic Ring tricky, you can use the chain method instead: Ch 4, and sl st into the first ch to form a ring.
Round-by-Round Instructions
Round 1: Building the Foundation
- Ch 3. This beginning chain-3 counts as your very first double crochet stitch throughout the pattern.
- Work 2 dc into the center of the magic ring. You now have a cluster of 3 dc (counting the initial ch-3). This is the first side of your square.
- Ch 2. This creates your first corner space.
- Work 3 dc into the ring. (Second side).
- Ch 2. (Second corner).
- Work 3 dc into the ring. (Third side).
- Ch 2. (Third corner).
- Work 3 dc into the ring. (Fourth side).
- Ch 2. (Fourth corner).
- To close the round, find the top of your beginning ch-3 and make a sl st into it.
- Pull the starting yarn tail to cinch the center of the ring tightly closed.
At the end of Round 1, you should have four clusters of 3 dc and four ch-2 corner spaces. (12 dc total)
Round 2: Shaping the Square
- Ch 3 (counts as 1 dc). This first stitch is made in the same spot as your joining slip stitch.
- Work 1 dc in each of the next 2 sts.
- Now you’ve reached the first corner space. In the ch-2 corner sp, work (2 dc, ch 2, 2 dc). This is the standard corner increase for a solid square.
- Work 1 dc in each of the next 3 sts along the side.
- In the next ch-2 corner sp, work (2 dc, ch 2, 2 dc).
- Repeat steps 4 and 5 two more times.
- To finish the round, sl st to the top of the beginning ch-3.
At the end of Round 2, each side should have 7 dc stitches. (28 dc total)
Round 3: Expanding the Square
- Ch 3 (counts as 1 dc).
- Work 1 dc in each stitch across the side until you reach the corner space. (You will dc in the next 4 sts).
- In the ch-2 corner sp, work (2 dc, ch 2, 2 dc).
- Work 1 dc in each stitch across the next side (7 sts).
- Repeat steps 3 and 4 two more times.
- Work 1 dc in the remaining stitches of the first side (2 sts).
- Sl st to the top of the beginning ch-3 to join.
At the end of Round 3, each side should have 11 dc stitches. (44 dc total)
Continuing the Pattern: Rounds 4 and Beyond
The pattern is now established. To make your square larger, simply repeat the logic from Round 3 for each subsequent round:
- Start with a ch-3 (counts as 1 dc).
- Work 1 dc in every dc stitch along each side.
- In each ch-2 corner space, work the corner sequence: (2 dc, ch 2, 2 dc).
- Join each round with a sl st to the top of the beginning ch-3.
Continue until your square reaches the desired size.
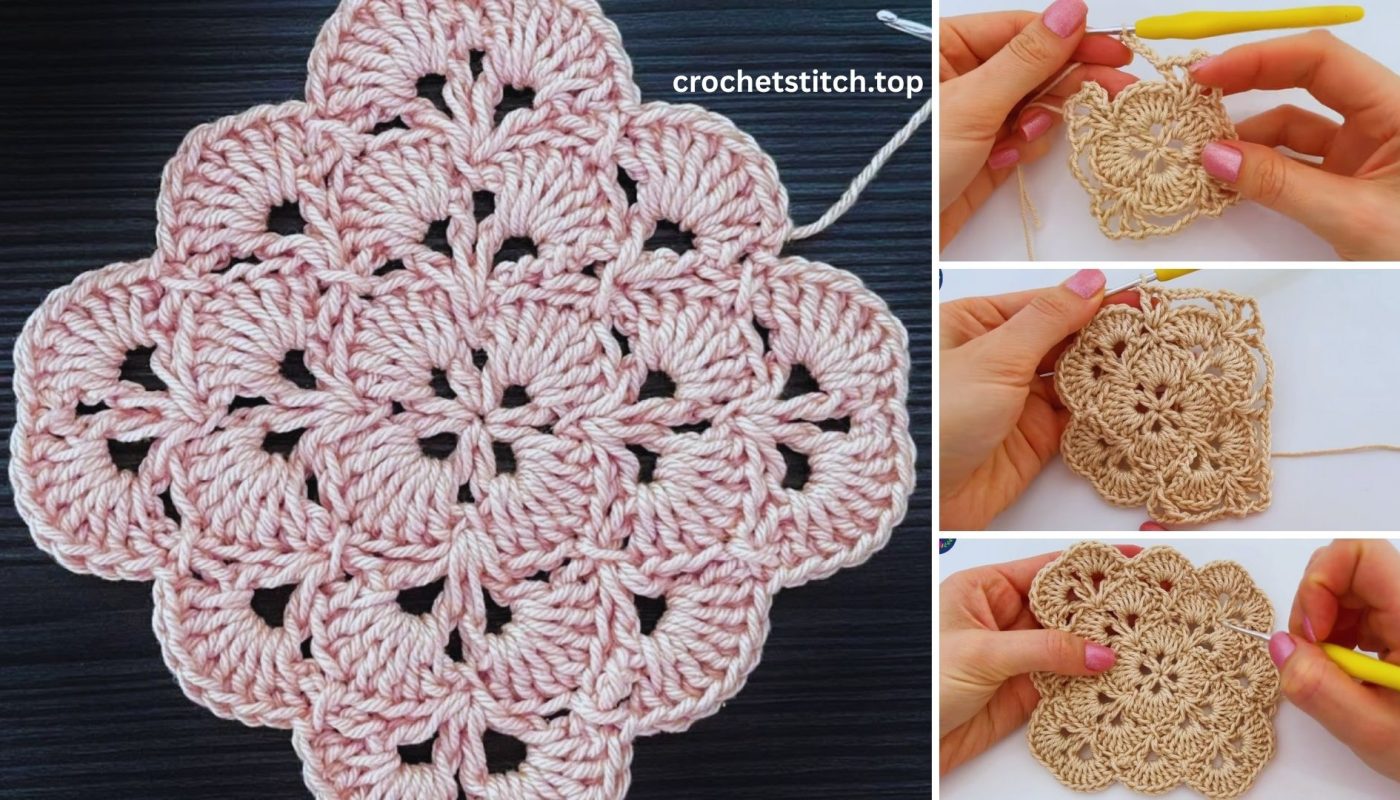
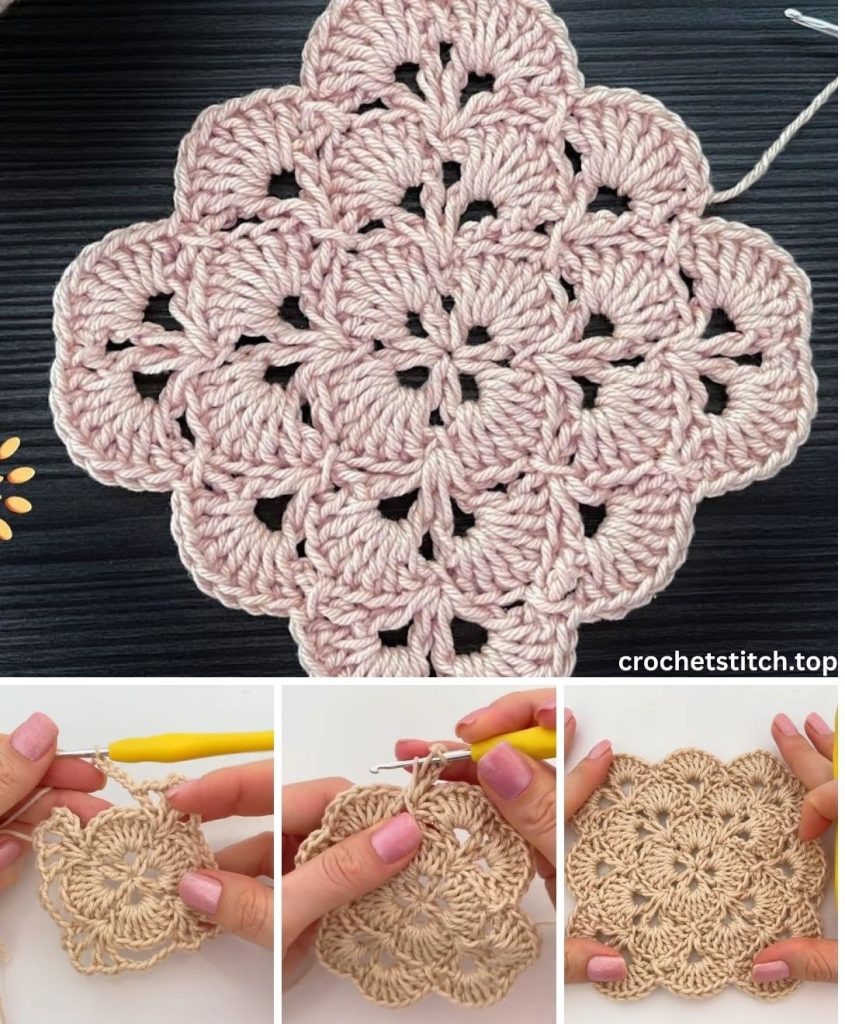
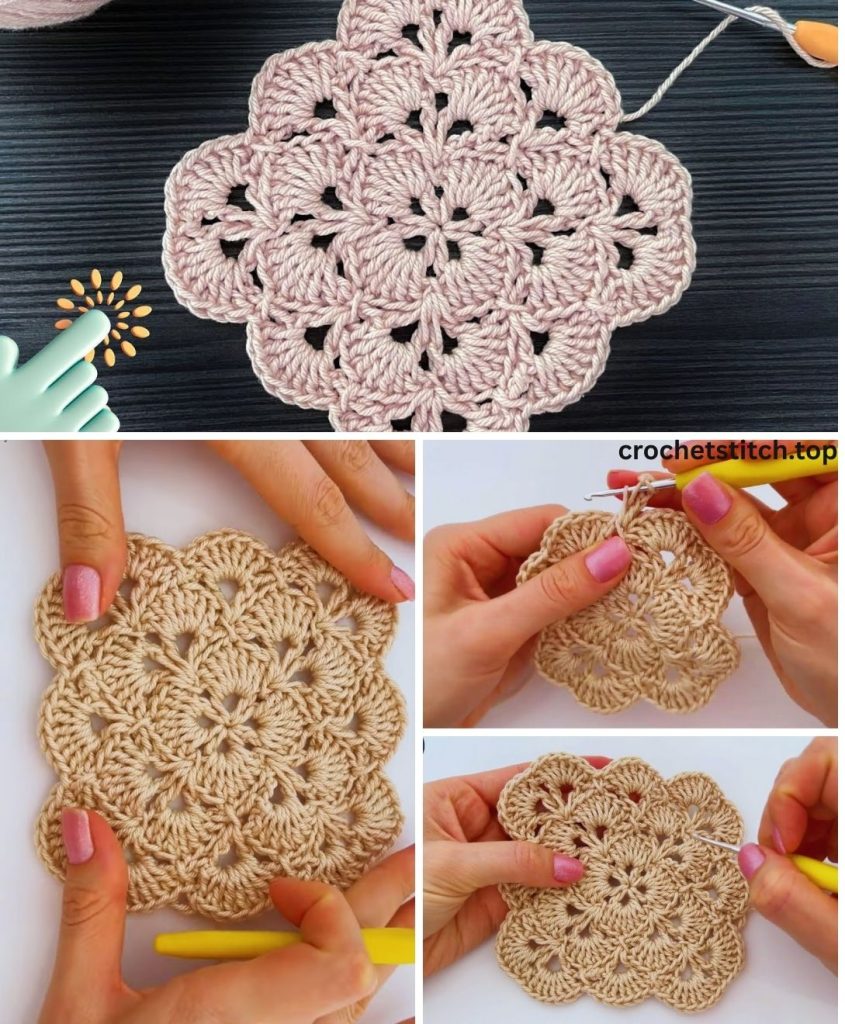
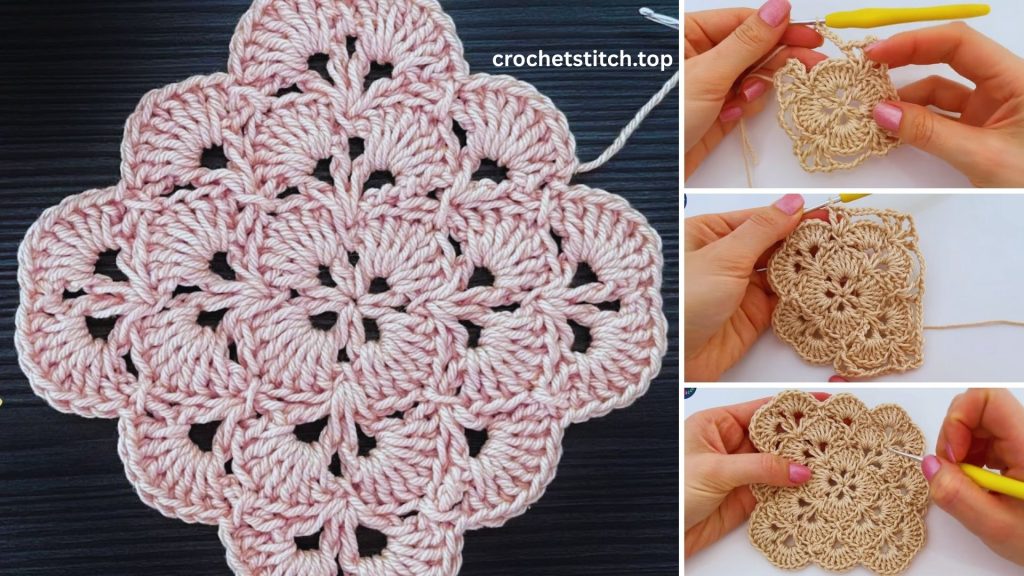
Pattern 2: The Traditional Granny Square
This is the iconic, quintessential crochet square recognized by many. It’s known for its lacy, clustered appearance and is incredibly fast to work up.
Starting Your Square
Begin with a Magic Ring or the Ch 4, sl st method, just like the solid square.
Round-by-Round Instructions
Round 1: Foundation Clusters
- Ch 3 (counts as 1 dc).
- Work 2 dc into the ring. This forms your first “3-dc cluster.”
- Ch 2. (First corner).
- Work 3 dc into the ring. (Second cluster).
- Ch 2. (Second corner).
- Work 3 dc into the ring. (Third cluster).
- Ch 2. (Third corner).
- Work 3 dc into the ring. (Fourth cluster).
- Ch 2. (Fourth corner).
- Sl st to the top of the beginning ch-3 to join. Pull the tail to close the center.
End of Round 1: Four 3-dc clusters and four ch-2 corner spaces.
Round 2: Introducing Side Clusters
- Ch 3 (counts as 1 dc). Now, turn your work slightly to access the corner space you just created with your joining slip stitch.
- In that same first corner space, work (2 dc, ch 2, 3 dc). This is your first corner of the new round.
- Ch 1. This chain-1 creates the space between clusters on the sides.
- Move to the next ch-2 corner space. Work (3 dc, ch 2, 3 dc) in it.
- Ch 1.
- Repeat steps 4 and 5 two more times.
- To finish the round, sl st to the top of the beginning ch-3.
End of Round 2: Each corner has a (3 dc, ch 2, 3 dc) group, and there is a ch-1 space along each of the four sides.
Round 3: Establishing the Rhythm
- Sl st into the next 2 sts and into the first corner space. This moves your starting point to the corner, which is a common and neat way to begin subsequent rounds.
- Ch 3 (counts as 1 dc). In that same corner space, work (2 dc, ch 2, 3 dc). (First corner made).
- Ch 1.
- Now you’ll work into the ch-1 space from the previous round. Work 3 dc into that ch-1 sp.
- Ch 1.
- You’ve reached the next corner. In the ch-2 corner sp, work (3 dc, ch 2, 3 dc).
- Repeat steps 3-6 around the entire square.
- After your final ch-1, sl st to the top of the beginning ch-3 to join.
End of Round 3: Each side now has one 3-dc cluster between the corners.
Continuing the Pattern: Rounds 4 and Beyond
The pattern is now set. For every new round:
- Start by slip stitching over to the first corner space.
- Begin the corner with a ch-3, then (2 dc, ch 2, 3 dc).
- Work [ch 1, 3 dc] in each ch-1 space along the side.
- In each corner space, work (3 dc, ch 2, 3 dc).
- Join the round with a sl st.
Each round will add one more 3-dc cluster to each side.
Finishing Touches: Tips for Perfect Squares
- Changing Colors: To change colors, complete the final yarn over of the last stitch of your old color with the new color. Drop the old color (you can cut it, leaving a tail) and continue with the new one.
- Weaving in Ends: This is the most crucial step for a durable and neat project. Use your yarn needle to weave the tails back and forth through the back of your stitches in at least three different directions. This ensures they won’t unravel.
- Blocking Your Squares: Blocking is like magic for crochet. It involves getting the square wet (by soaking or steaming) and pinning it to a mat in a perfect square shape to dry. This evens out your stitches, defines the corners, and ensures all your squares are a uniform size and shape, making them much easier to join together.
What Can You Make With Your Squares?
Now that you’ve mastered the art of the crochet square, what will you create?
- Blankets & Afghans: The classic choice. Join squares of different colors for a vibrant patchwork look.
- Pillow Covers: A quick and satisfying project to brighten up your living space.
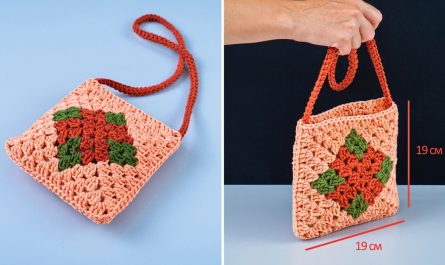
- Market Bags & Totes: Solid squares create a sturdy fabric perfect for a durable bag.
- Garments: Cardigans, sweaters, and vests made from granny squares have a timeless, bohemian feel.
- Table Runners & Potholders: Add a handmade touch to your kitchen and dining decor.
Enjoy the process, experiment with colors, and appreciate the simple rhythm of turning a single strand of yarn into a beautiful, tangible object. Happy crocheting!